Christmas holiday season is upon us!
Are you the one among them who wants to kick off the Christmas holiday season with great ideas? Then, you are in right place.
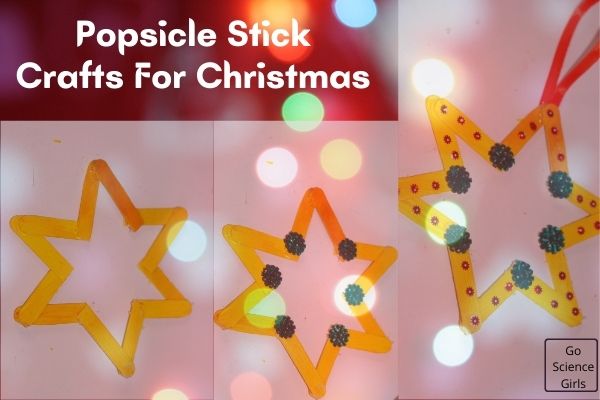
I am going to show you how to make beautiful Christmas Stars using popsicle sticks – Amazing idea for your Christmas Tree Decoration collection.
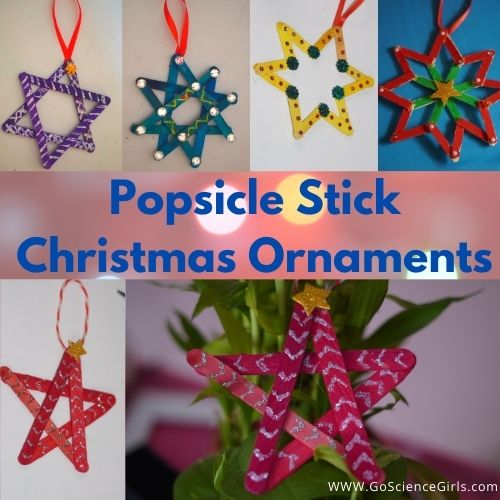
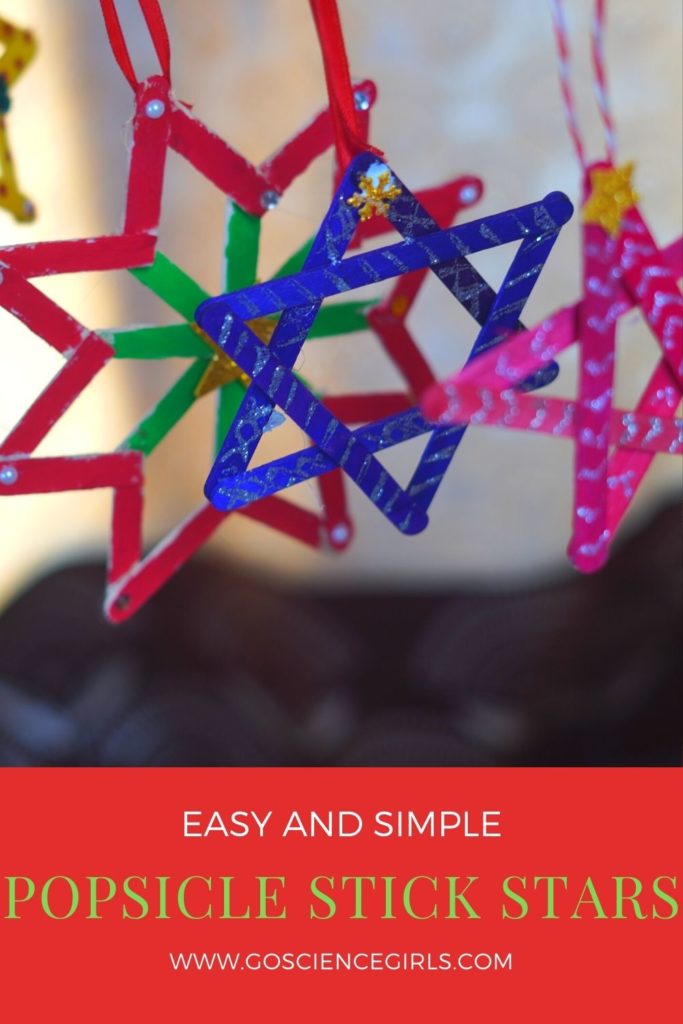
Popsicle Christmas Star Decorations
Let us start with our STAR decorations in five different ways right from a basic shaped ones to a little complex ones but in a simple and fun way. Here we go!
Materials Required
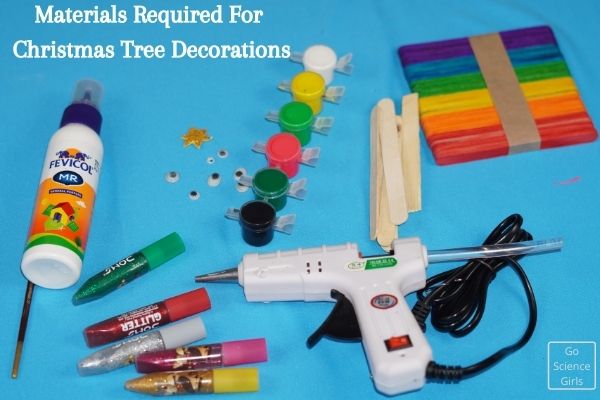
- Popsicle Sticks
- Glue (You can use normal glue or hot glue)
- Water Color Paints
- Some craft decorative stuff like pearls, stones, flowers, satin ribbons, glitter tubes, handing threads, etc.
That’s it! We are ready to go…!
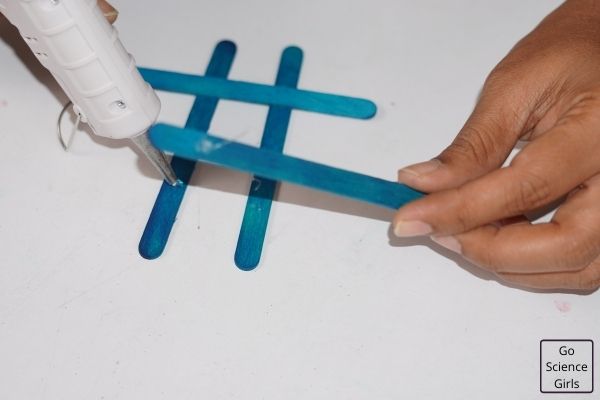
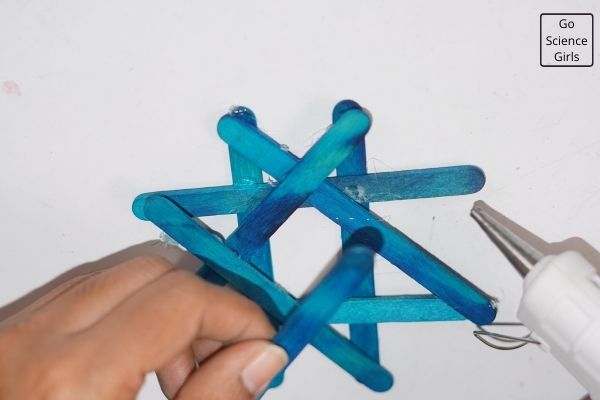
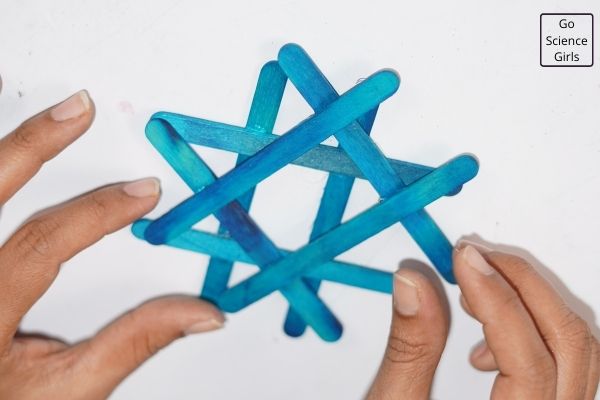
Basic STAR Hanging
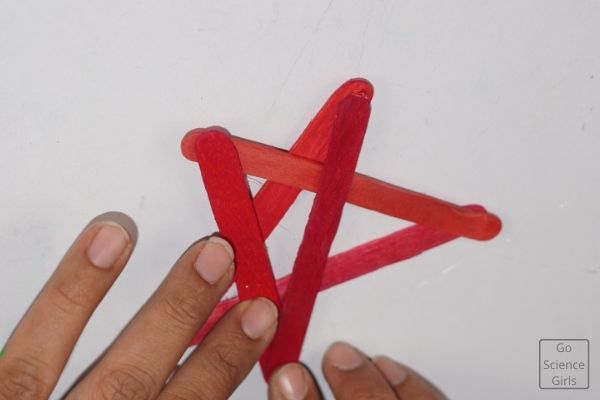
Now, take two popsicles and attach them in the shape of ‘V’ using glue. Make another such ‘V’ shape that means we are making two ‘V’ shapes.
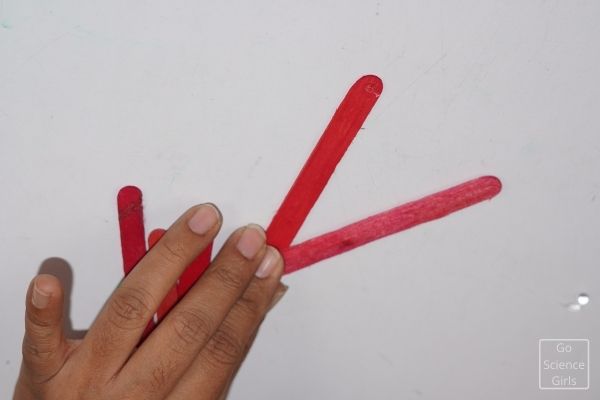
Then, keeping one V shape as a bottom and attach another one on top of it in horizontal position. Fix the top one to the base at one free end as shown in the picture.

Then, bring the light colored and highlighted Popsicle stick and close the open ends of the figure to make our beautiful star.
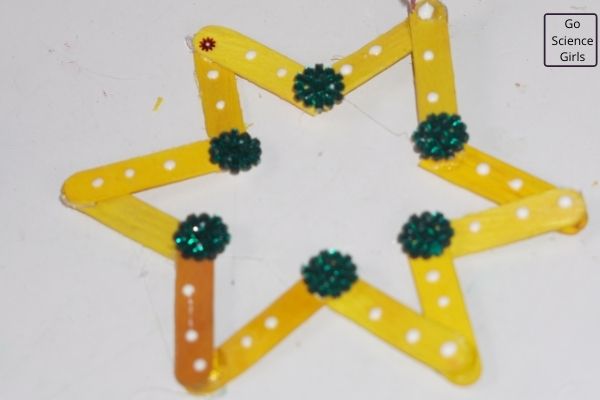
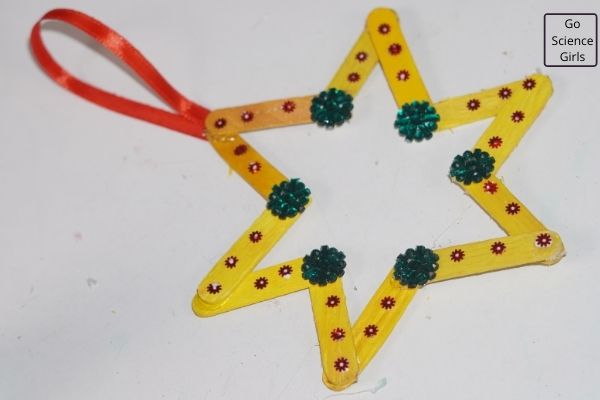
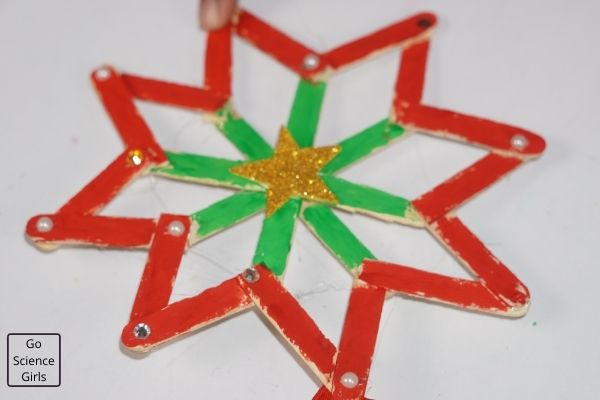
It is time to decorate our star using some glitters. We used silver colored glitter to decorate the star and it looked very beautiful.
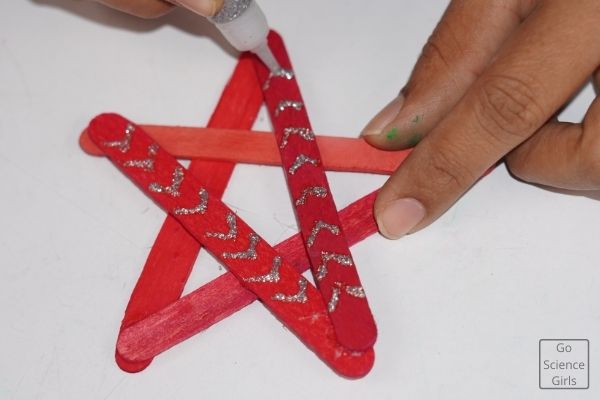
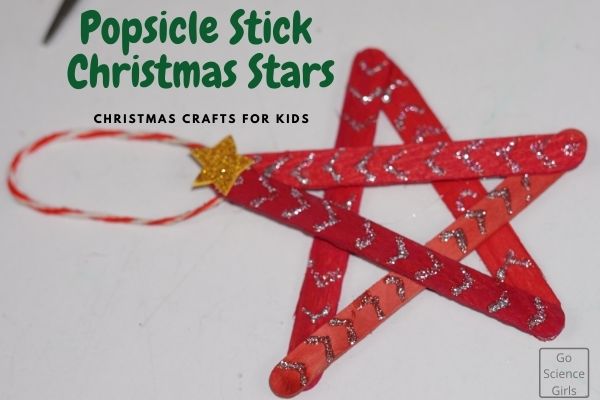
Finally at one corner of the star, glue a craft thread as the way to hang. And to cover the mess work at the attachment of hanging thread, we glued a star shaped marble paper figure.
So that our beautiful star looks much more impressing and attractive on your Christmas tree or door or wall.
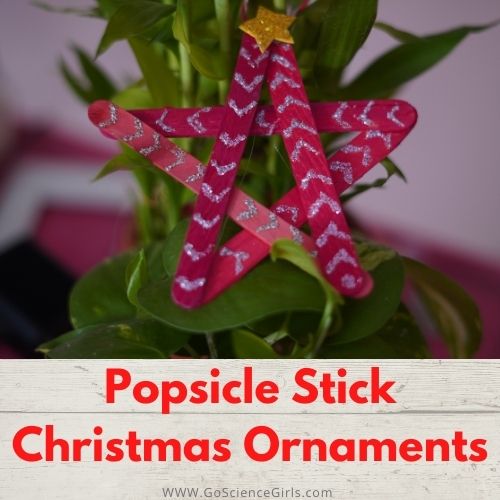
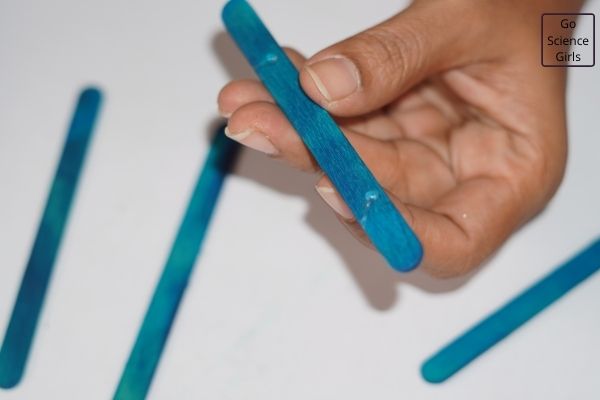
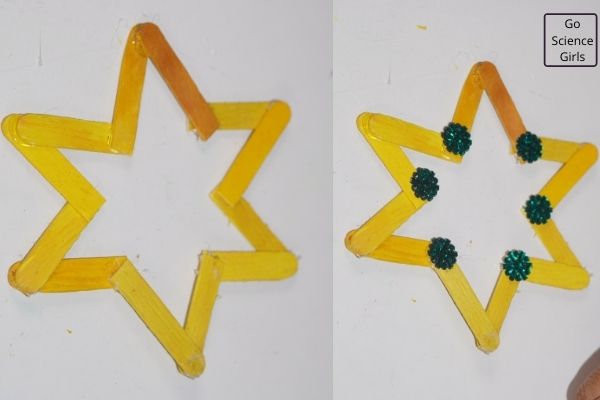
Firstly, pick five Popsicle sticks and a red color paint. Then, paint all the five Popsicle sticks with red color and let them to dry for some time.
We kept one popsicle stick in light red shade because to show some difference or highlight the star (You can paint according to your choice). After some time check all the painted Popsicle sticks dried up without any moisture.
Do not use the Popsicle sticks for crafting until they become completely dry. Because a little amount of moisture may spoil our decorations in just a day or two. So, please check thoroughly before using the painted popsicles for crafting.
Star Shape using Triangles
This is such a wonderful craft activity that teaches geometric shapes as well. Yes, children learn about triangles because we are making a wonderful star just making two triangles. Let us see how!
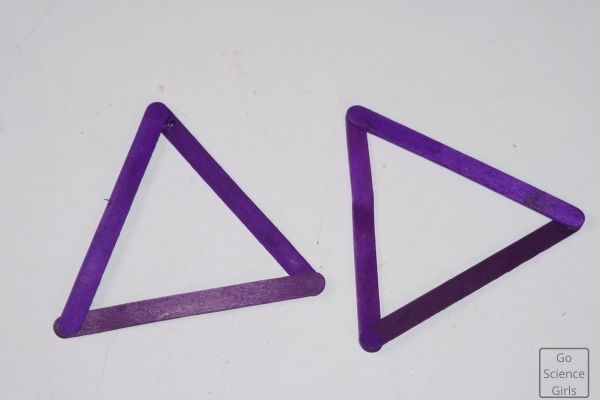
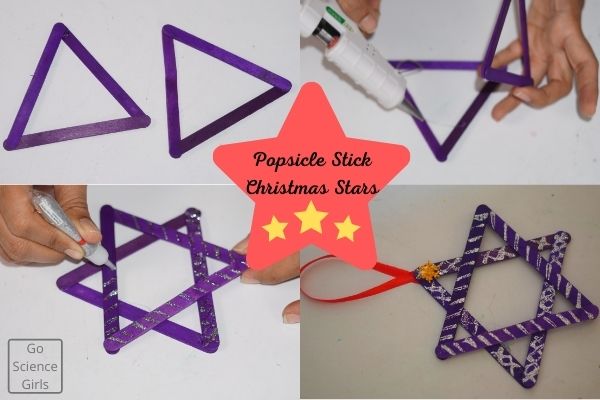
As a first step, take three Popsicle sticks and them in the shape of triangle. Before that show your kids what is a triangle shape and how it is useful in our craft activity.
If your children are aware of triangles, then give them six Popsicle sticks and let them create triangle shapes.
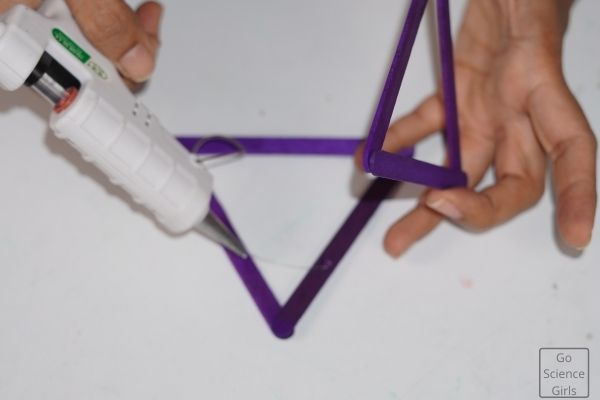
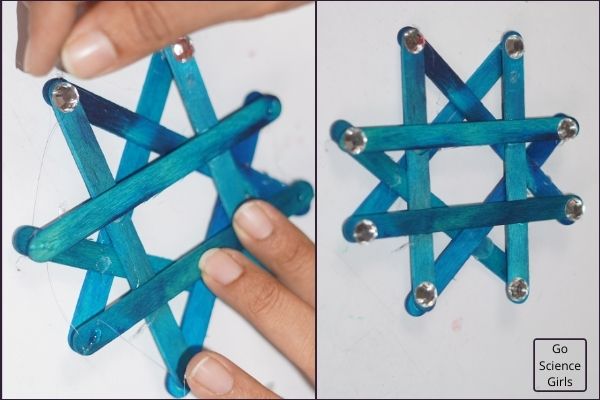
We chose purple color six Popsicle sticks. Use three of them to make triangle shape using glue. So, in total we can make two triangles using six Popsicle sticks.
Now, bring the two triangles together and place them one as a bottom and the other on the top but just change the angle of the top one to create a star.
That’s it, glue the points where both the triangles attach and you can see a wonderful star décor.
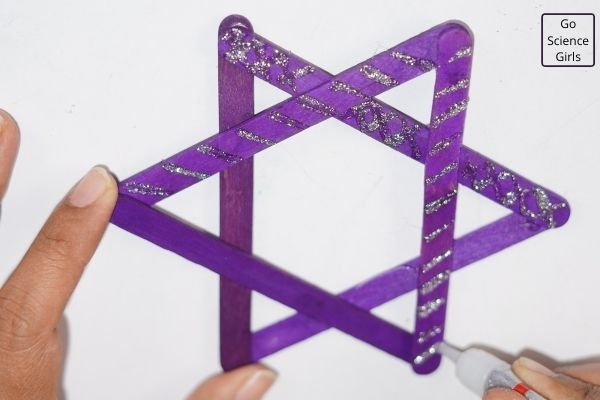
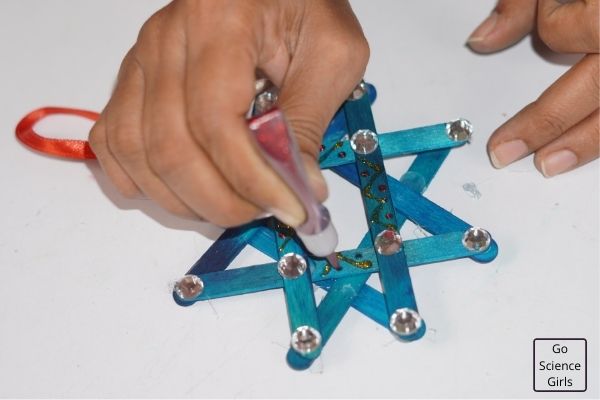
The next step is to decorate the star. We used silver color glitter and drew some lines on the popsicles to decorate the star.
Decoration part is completely depend on every individual choice. O, you are free to decorate your stars in a way of your choice.
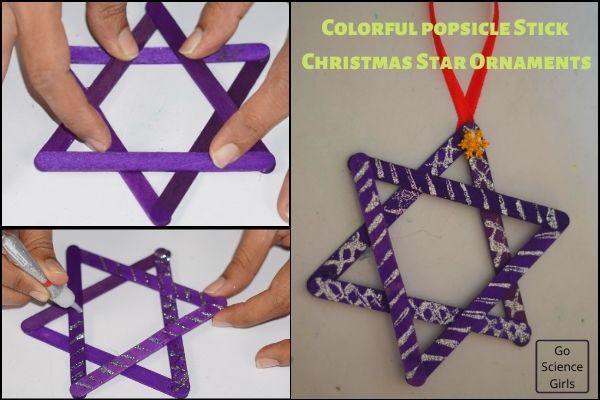
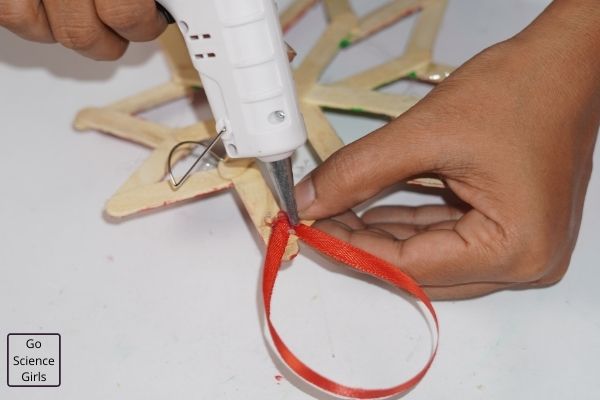
Finally, make a hanging part using a red colored satin ribbon and glue on to one end of the star. Our second model of star décor is ready to hang to your Christmas tree or simply use it to decorate your walls.
Star Décor using Square Shape
To make this fascinating star décor, we are taking the square shape as a frame. This shape looks a little complex but it is very easy to arrange regular Popsicle sticks.
As a first step, pick 8 Blue Colored Popsicle stick. Let them dry completely to keep our efforts of making beautiful star decors safe for long days.
Firstly, pick two sticks and place them side by side leaving an inch distance in between. Such that the two Popsicle stick stay parallel to each other.
Now bring the other two Popsicle sticks on top of the set up as a base and arrange them in the same way but perpendicular to the base set up.
Now, we can see a square shape clearly in the middle. This shows we have arranged the popsicles perfectly.
The next step is to follow the same instructions as mentioned in the above paragraph.
That means we are creating another structure as same in the above using another fur Popsicle sticks. Once you are done, bring the second structure over the first structure which acts as a base here.
Just keep in mind that you need to place the second frame over the first frame in opposite direction or perpendicular to each other such that the corners of all the free ends of the sticks come in a position to attach and make a wonderful star.
Still we can see a perfect square in the middle which shows our star décor is in perfect shape.
That’s it! Now, decorate the star using big and small sized stones at all the corners and meeting points of the star décor.
We even used green and red colored glitter to highlight the square shape formed in between the whole structure of star.

As a last step, prepare a hanging part using satin ribbon and glue it to one end of the star décor. Amazingly, another model of star décor has become a part of your Christmas decorations. Sounds cool right!?
Star Décor using Slanting and Standing lines
Is your kid a toddler or a kindergarten? Then, this makes a perfect activity that extends the school lessons for learning sleeping and standing lines.
I know that you will also agree to my statement after performing this craft with your children.
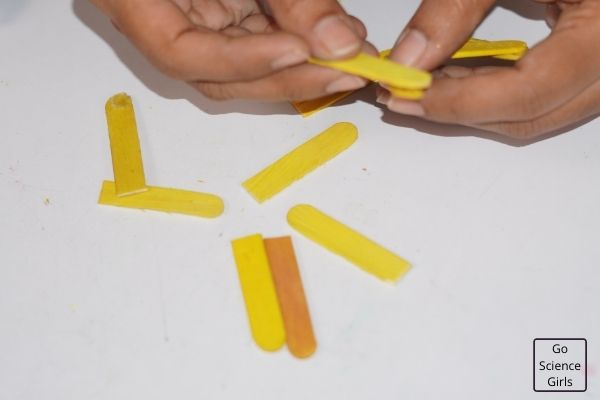
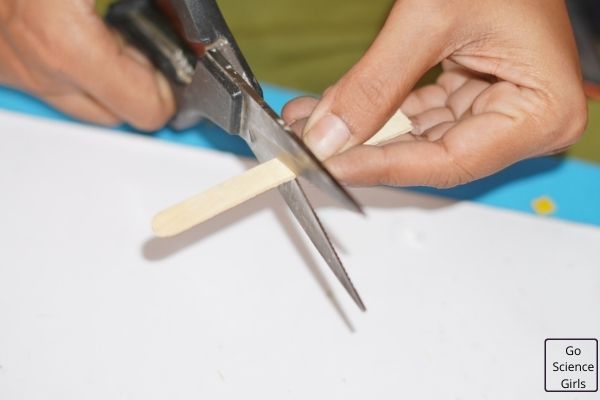
Firstly, we need to pick four Yellow Colored popsicle Sticks. Once your popsicles are ready for crafting, cut each Popsicle stick into two halves. Now, you have 8 halved yellow colored Popsicle sticks in hand.
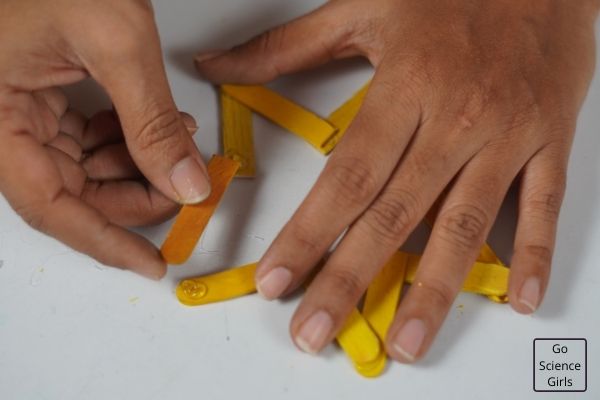
Now, create two ‘M’ shapes using four halved popsicles by keeping two halves in sleeping position and the other two in standing position.
Here, you can use this trick to teach your kids about sleeping and standing lines and even come in use to show how these lines make different alphabets.
Also, create two ‘V’ shapes using two halved popsicles for each. It is time bring our alphabets into picture to make an amazing star décor.
Place the two ‘M’ shapes opposite to each other and close the gaps on the side using two ‘V’ shapes as shown in the figure.
Decorate it using craft stuff and attach the hanging part.
That’s it your star décor in another beautiful shape is ready to go on your Christmas tree.
Flower Shaped Star Décor
Flower shaped star décor is a big star décor among all the above star decors. It looks complex to make but simple and fun to create.
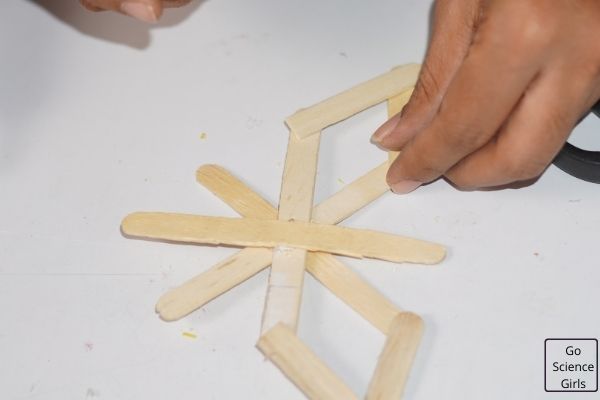
As a first step, make a flower shape using four popsicles. That means attach two popsicles in the shape of ‘X’ and then attach the other two sticks in the ‘plus’ shape over the ‘x’ shaped frame.
You can also make two ‘x’ shapes and attach then one over the other perpendicularly.
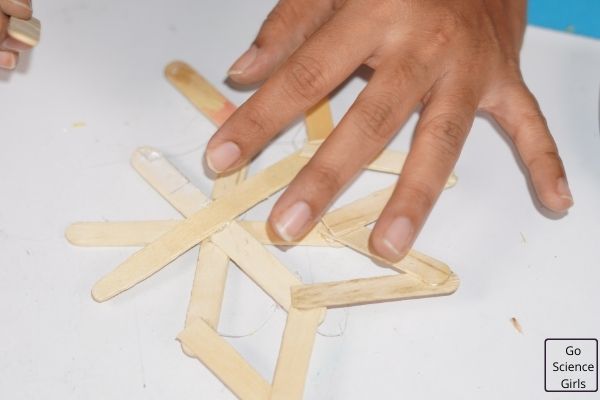
Then, make four ‘M’ shapes using halved popsicles as said in the previous shape. Now, glue on these ‘M’ shapes to the free ends of the flower frame.
Refer the figures attached in the post if you get stuck or confused. That’s it you are done with making flower shaped star décor.
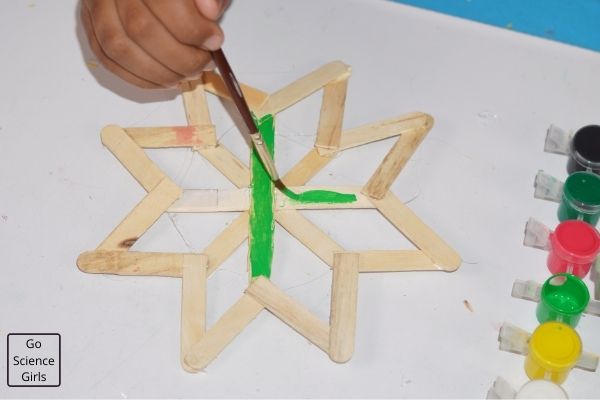
Paint the flower using green and red colored paints.
Decorate the star with a star shaped glitter paper in the middle and also place pearls or beads at the meeting points of the popsicles.
Attach the hangings and decorate to your Christmas tree or walls.

Interested in more Popsicle Ornament Ideas for your Christmas Tree? Try our,
Popsicle Wreath Christmas Tree Ornaments
Reindeer craft from Popsicle Sticks
Popsicle Stick Snowflake Ornaments
Hope you all enjoyed the post on creative craft stuff which is very useful for your Christmas decorations.
This craft idea helps your child in improving his/her fine motor skills.
Also, this classic craft idea makes an innovative and fun activity to learn about various things and improve the creative thinking skills.
Happy Christmas!
