Once you teach kids about magnets and magnetic field, the next best thing to teach about Electromagnets.
In this post, let us explore how you can make an electromagnet in less than 5 minutes.
But before exploring electromagnet – kids need to understand the difference between Temporary and Permanent Magnets.

Temporary and Permanent Magnets
Do you know that magnets can be temporary?
A temporary magnet gets magnetic properties and behaves like a magnet when placed in a strong magnetic field. The magnetic properties disappear when you remove them from the magnetic field.
You can test this property by attaching a permanent magnet with a nail and picking up paper clips. Though a nail, by default, does not have any magnetic field, when it is placed in contact with a permanent magnet, the nail will attract paper clips.
You can remove the magnet from the nail and see all the paper clips dropping – It is because the temporary magnet (nail) stops being magnetic when the field disappears.
It is the basic principle behind electromagnet.
Electromagnets
Unlike the previous experiment, Electromagnets created by a magnetic field induced by passing electricity.
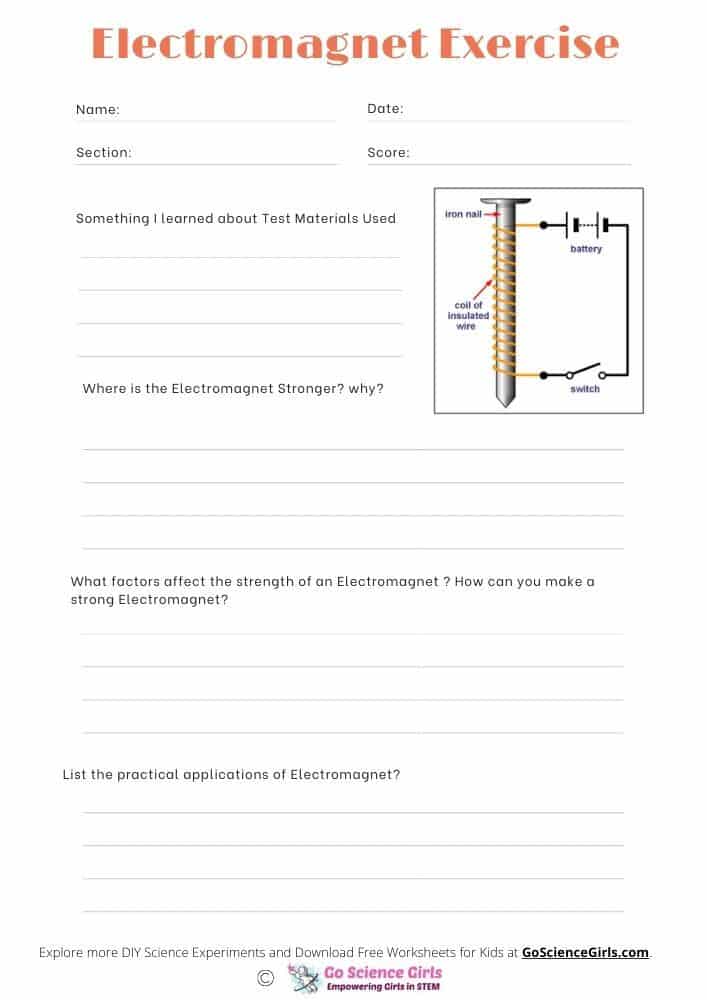
In this experiment, we will create an electromagnet by wrapping a copper wire around a metal piece such as an iron nail.
The copper coil is then attached to an electrical source such as a battery. When the electricity flows from the battery through the copper wire – the circuit produces a magnetic field around the coil – which magnetizes the nail.
The key advantage of using electromagnet is the ability to turn them off or on by closing and opening the electrical circuit.
This advantage makes the electromagnets very useful in various day-to-day appliances, such as loudspeakers, MRI machines, generators, heavy lifting equipment, and even simple motors.
Things We Need

Copper Wire (14 Gauge preferred)
Iron Nail / Any long metal piece
C or D Battery
Wire Cutter / Stripper
Electrical Tape
Items to Test (both Non-Magnetic & Magnetic materials)
Step by Step Approach to Making an Electromagnet at Home

Cut a copper wire for about 1 -2 foot long. If the wire has insulation, use wire strippers to remove it to expose the copper conductor.

Leave about 3 to 4 inches of wire and then start wrapping the wire around the nail. The copper wire should be wrapped as a coil until the end of the nail. Make sure to leave out another 3 to 4 inches of wire at the end.

Attach the exposed ends to C or D type battery ends (one on each side). You can use electrical tape to secure the wires to the battery.

To test our electromagnet works, bring up the wire wrapper nail close to small metal articles such as paper clips. You should see that the paper clips are attracted to the nail.

Have your kids test the electromagnets with various objects (papers, plastic products, popcorn, coins, etc.) – you can also ask them to record their observation in the below worksheets.

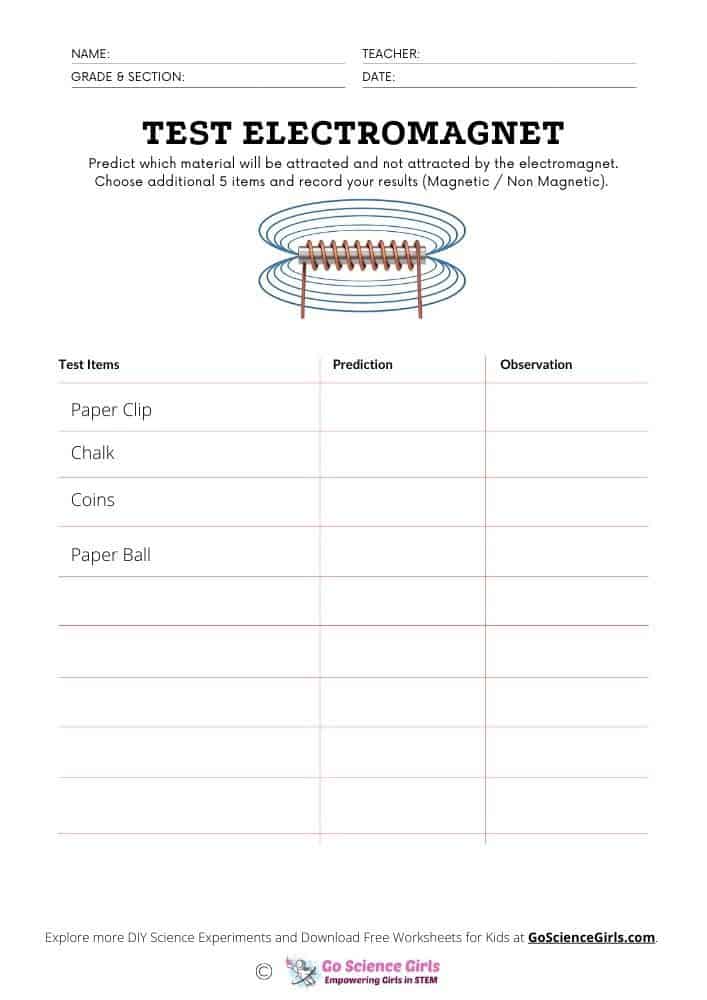
Worksheet for testing and recording magnetic properties with different materials
Another Electromagnet worksheet to capture student’s understanding on concepts.
Explore Other Interesting Magnet Science Activities:
Science Behind Electromagnets
When electricity passes through the coil wrapped around the nail, the moving charges produce a magnetic field.
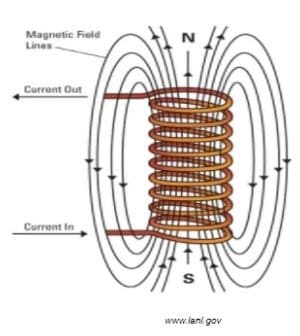
If the current flows through a straight wire, it produces a circular magnetic field around the wire. But when we wrap the wire as a coil (called Solenoid) – each wire produces a magnetic field – but these magnetic fields merged to produce a stronger magnetic field.
However, the coil by itself is very weak to pick up any materials using its magnetic field. So we need to add a ferromagnetic core (in our case – the nail). Ferromagnetic materials typically have tiny individual magnetic domains spread across all over the material. In a typical scenario – these small magnetic domains aligned randomly, so they cancel each other out.
But in the presence of an external magnetic field (such as the one produced by Solenoid) – these individual magnetic domains align with each other in line with the external magnetic field – making the entire magnetic field much stronger.
The coil attached to the positive end of the battery becomes the south pole, and the other end attached to the negative end become the north pole of the magnet. Thus, by changing the current flow – you can reverse the north and south of the electromagnet poles created.
Besides, electromagnets can be switched on and off by switching on and off the electricity passing through the Solenoid.
The magnet’s strength can also be controlled by the number of coils wrapped on the ferromagnetic core, the amount of electricity passing through the coil or even by the material chosen to form the core. You can extend this science experiment by altering one of these materials.
Just a word of caution: The wires can become very hot when connected with electricity. So always switch it off / disconnect from the battery source when not used.
Lesson Plan
- Gather required materials for this electromagnetic challenge. You can choose to conduct this experiment through groups or individually with kids.
- Discuss with students – how magnets work and basic principles of magnetism.
- Discuss the differences between permanent and temporary magnets.
- Hand out the worksheet and allow kids to predict the outcome for the given materials. (worksheet is shown above).
- Either as a group or individually, allow students to complete the experiment.
- Make the students complete the rest of the worksheet.
- Finally, discuss what went well in their prediction and what did not go well – and the reason behind it. Now hand over the additional worksheets to make them think more profound about the concepts.
More References:
https://www.first4magnets.com/downloads/1377872469Activity-How-to-make-an-electromagnet.pdf
https://www.deltaeducation.com/broward/pdfs/gr4_PDFs/gr4_q4_act38.pdf
Electromagnet Vocabulary : https://peakstudents.org/wp-content/uploads/2020/04/PEAK@Home-Electromagnetic-Forces-1-1.pdf
Strength of Electromagnets: https://www.sciencea-z.com/science/resource/SL_Gr_3_Effects_of_Forces_L4_all_printable_resources.pdf
