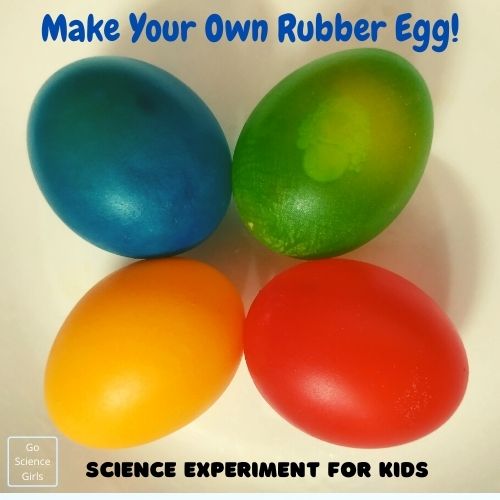
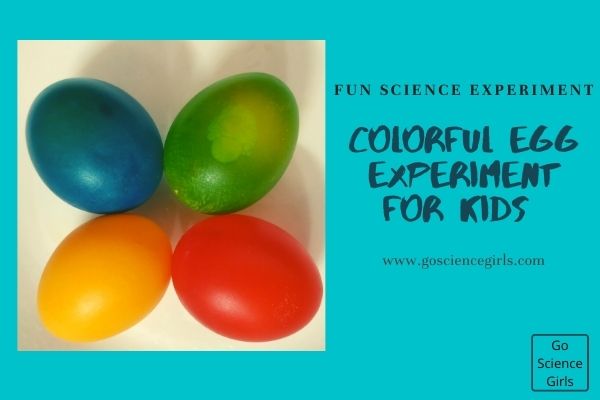
Are you looking for simple experiments that explains about the mineral calcium and layers of egg? You are on the right page to find such simple easy and fun science experiment that teaches kids about eggs and their properties. i.e. ‘Rainbow Rubber Egg Science Experiment’. Read on to learn more about this super cool science activity of making rubber eggs.
Rainbow rubber egg science experiment is a colorful and attractive experiment for kids to investigate eggs. This experiment offers a great opportunity to explore egg science in an educational and entertaining way. It is easy to set up and finish but offers a week’s worth of observations.
This is an extension of our Naked Egg Experiment. I have done a lot of research on internet to perform this experiment in an easy and simple way such that kids will feel more interested and happy to investigate this activity with happy faces. Finally, I found this method of creating rubber egg is as simple as grabbing an egg from your fridge door. Making a rainbow rubber egg activity is definitely a wait and see science project, activity, and experiment but just wait for a few days, you and your kids will be amazed at what happens to an eggshell when mixed with other solutions. Do you want to know what those magical ingredients are that turns the egg shell in to a rubber kind thing? Here is the experiment details with complete description. Have a look and try to turn your egg in to a rubber egg.
Before we step in to the experiment, let us make our children learn about different egg layers. Turning a hard layered egg shell in to a rubber egg is a great way for kids to learn about different layers of an egg. An egg has following layers:
1) The eggshell made from calcium carbonate
2) Two shell membranes which protect bacteria from entering the egg
3) The egg white or albumen which provides protein
4) The yolk membrane which holds the egg yolk together
5) The yolk which contains vitamins, minerals and fat
If you puncture the membrane, you can see the white and yolk.

As we all know and feel eggs are hard enough to hold the inside things, which is how we can play with we can play with it without breaking it. Inside of every egg shell, there is a membrane holding the “guts” of the egg in place and is located between the egg white and egg shell. Actually, there are two layers of membrane inside every egg called inner and outer membranes protecting the growing chick from exposure to bacteria. We learned that an egg has these many layers and strong enough but my kids raised a doubt of how come we make that strong enough layered egg shell into a rubber. We feel happy when kids ask questions while investigating any experiment which tells us that they are understanding and following the changes happening while investigating the experiment.
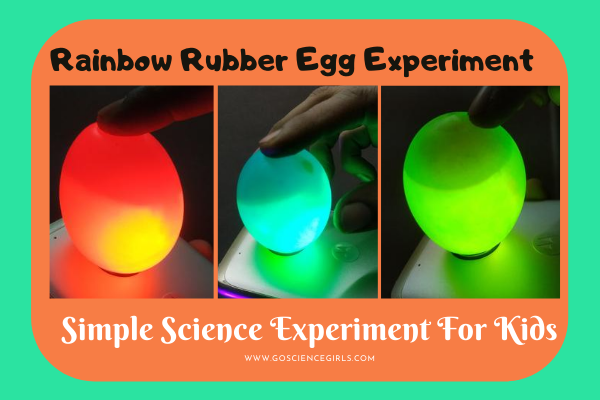
The answer for their question is: the membranes of egg are semi-permeable because of which the dye used in the experiment colors the egg outer membranes and changes its hard shell nature in to a rubber kind of nature when placed in different solutions. Hence, the texture of the egg feels rubbery and hence known as rubber egg. Since we are using different food colors and making the experiment colourful, and hence giving the name ‘Rainbow Rubber Egg Science Experiment’.
Fun fact: There is also keratin inside an egg membrane, which is present in human hair.
Now let us jump in to the experiment details:
How to make a Rainbow Rubber Egg Science Experiment
Rubber Egg Materials
Here are the simple supplies that we can gather from our kitchen and around the home easily. Let us see if we can make a rubber egg using these simple supplies.
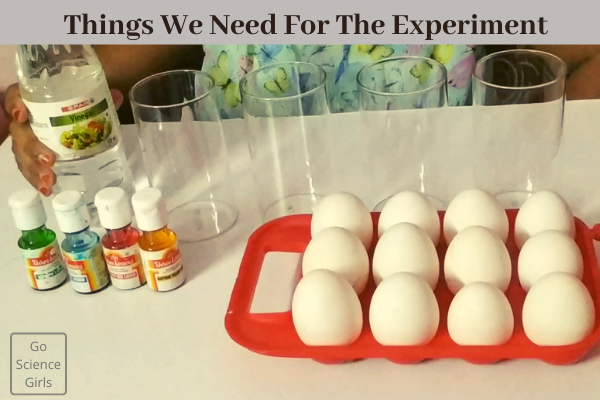
1) Raw Eggs
2) Collect different kinds of solutions from the kitchen such as vinegar, corn syrup, coke, water, salt, and oil.
3) Containers (pick up either Clear cup or Mason jar because we wanted to be able to observe our eggs over the course of a week)
4) Food Coloring
5) And a 3 days of your time
Instructions to Make a Rubber Egg
Before beginning the experiment, ask your children about what is their hypothesis on changes happening when a raw egg is placed in colored different solutions. You can ask the following questions to your kids:
1) Do you think the colored vinegar will remove the shells from the eggs?
2) Do you think you will be able to see through the eggs if the shells are removed and the eggs are colored?
3) Do you think the colored vinegar will color the eggs?
After they made their hypothesis, begin the experiment with all the mentioned supplies ready on the experiment table. The hypothesis made by your children will help to discuss later (after the experiment) with them about the experiment in a more interactive way. It is easy for the kids as well to understand and analyse the magical results.
Instructions
Step-1:
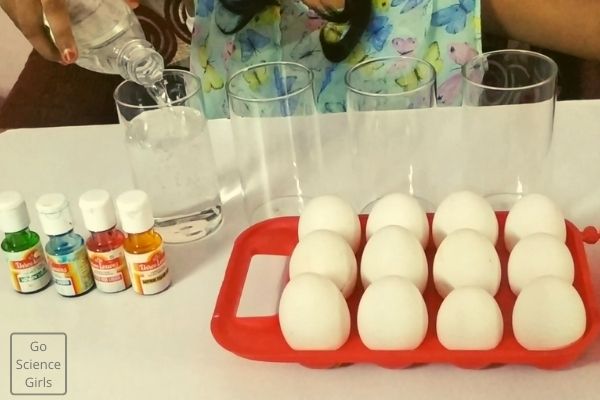
Set-Up the Experiment: Ask your children to collect glass containers or mason jars. You can choose any type of containers but make sure you are using only glass containers because glass containers offer a great visual view of amazing observations and results as the glass containers are transparent in nature.
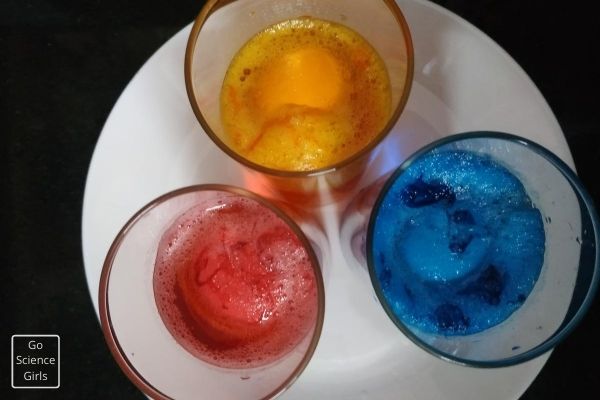
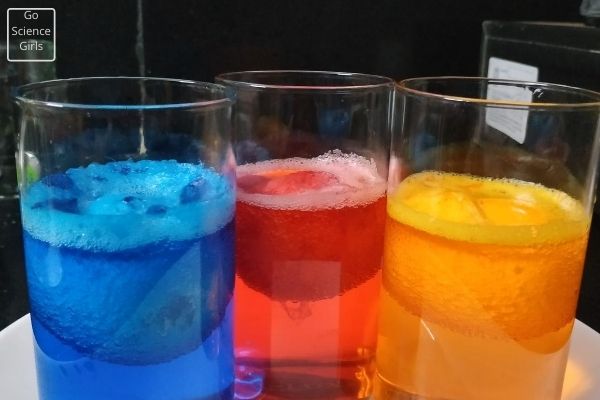
Since we are decided to make a rainbow rubber egg science activity, we require 7 glass containers to have every color of rainbow in each container. Fill each container with enough vinegar such that an egg is fully submerged. Add required amount of food coloring to each jar of different colors and stir well or until the color is mixed evenly. To find the results more bright and colourful, you can use neon food colors instead of normal standard colors.
Step-2:
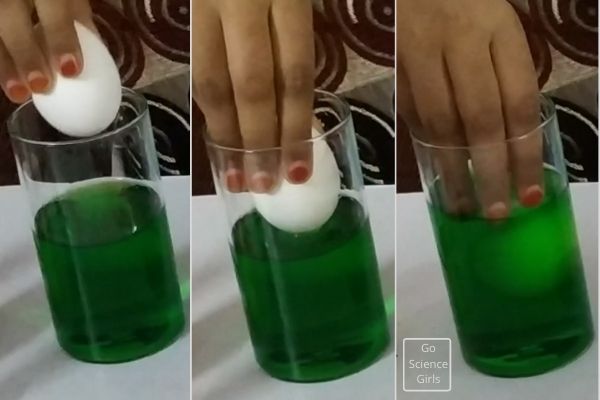
Place an Egg into the containers: Once you fill all the seven glass containers with enough vinegar and food colors (make sure the both are mixed evenly), carefully place an uncooked egg into the each jar. This step can be done even by your toddler kid. Engaging your kids in between the experiment makes them more excited to involve in the investigation.
Step-3:
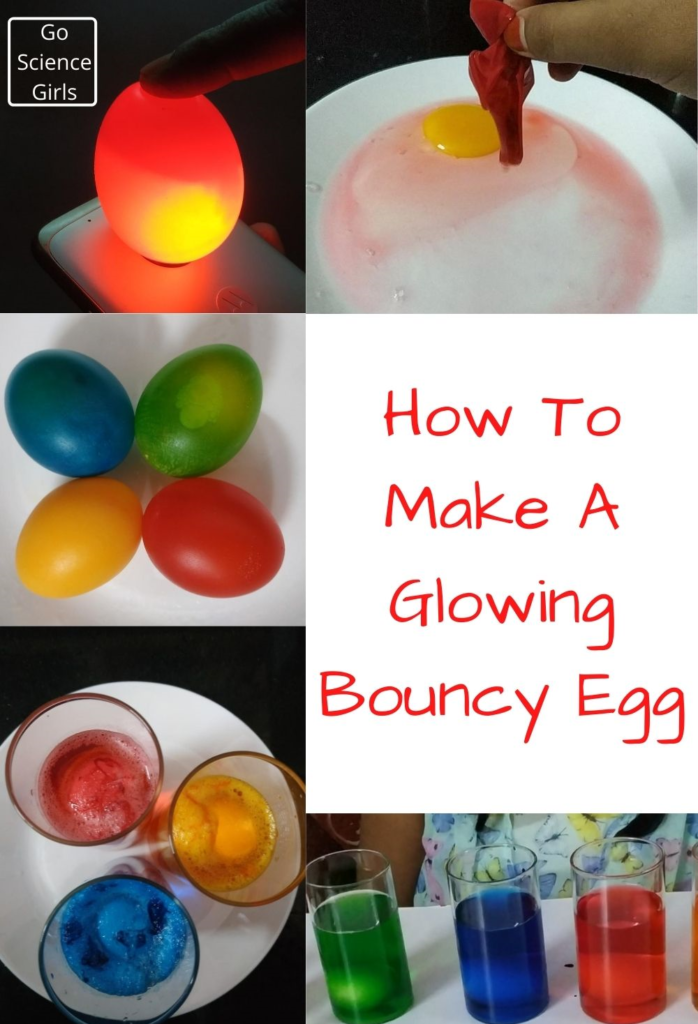
Wait: That’s it! You are done with the simple steps of the experiment. Now, as I already told you, you need to give some time (days) to observe the magical results. Ask your kids observe the experiment set up each day. The acidic nature of vinegar starts dissolving the egg shell day by day and over the course of several days. As the shell begin to dissolve, you can see bubbles formation on top of the glass container. Seeing the bubbles, you can confirm that the egg shell has begun to dissolve its hard shell part.
Step-4:
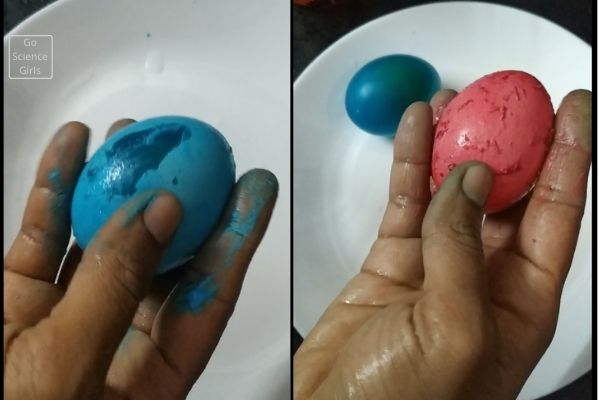
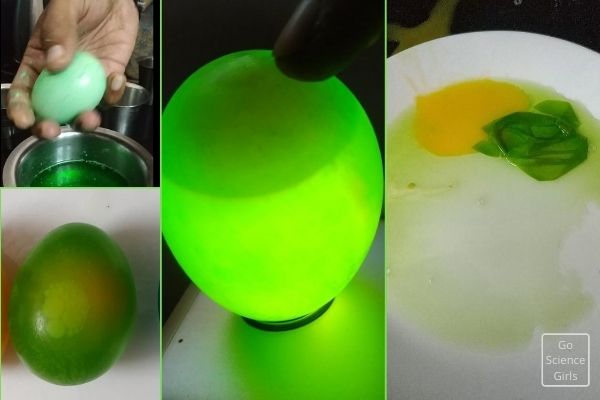
Rub Off the Shell: Let the experiment set-up stay for days to observe the outcomes. After 3-5 days, remove the egg from the vinegar solution and place it in a bowl of water. Gently rub away the shell to reveal the membrane that lies just below it.
Step-5:
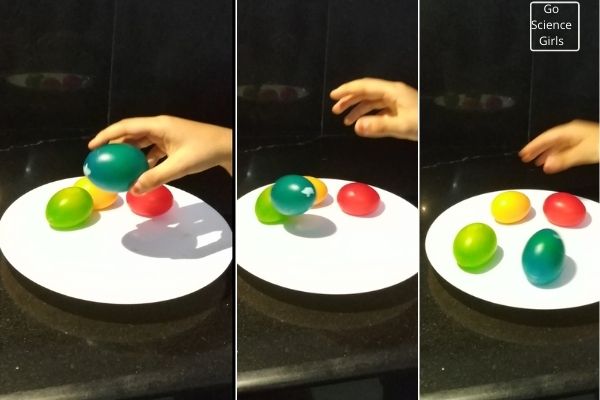
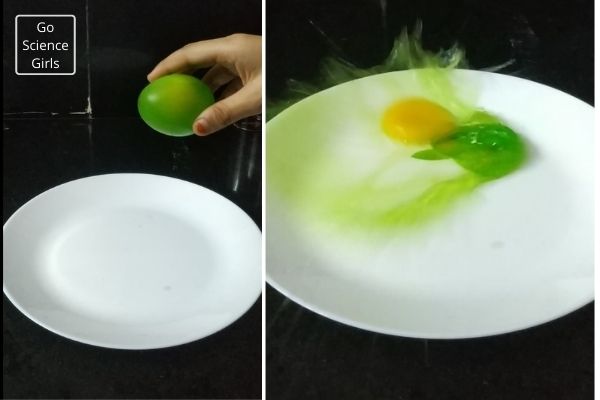
Bounce it..: Your egg is ready to play! Bounce it and play with it… But do not hit or bounce hard! The egg may seem like rubbery and bouncy but it is still raw from inside. Press it and bounce to test just how rubbery it is but beware, it will still break! Make sure you break at least one to see what the egg looks like inside!
Step-6: Repeat the same steps mentioned above but just replace the vinegar solution with coke, salt water, corn syrup, and olive oil (any kind of oil is ok..) and observe the changes and results. Different solutions give different types of results to the raw eggs when placed in them. Here are the results we observed when we have done at our home along with my children. Hope you get the same!

1) The egg placed in vinegar had lost its shell and became rubbery and also larger than when the experiment first took place.
2) The egg placed in enough and same quantity of corn syrup was developing a rubbery texture too but seemed slightly smaller than when the experiment took place.
3) The egg in the Coke solution still had its shell and had only been dyed a brownish color. No other change was noticed.
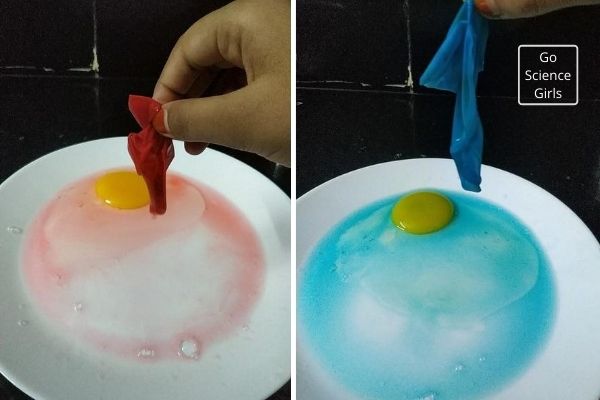
4) The raw egg placed in the salt water had its shell and had been turned a bluish color.
5) The olive oil egg still had its shell with no other changes.
Hope your kids enjoyed the simple science activity that can be done with easy supplies available around the year. Now let us learn the science behind this simple science activity.
The Science behind the Making Rubber Egg
Egg shell is made entirely of calcium carbonate (CaCO3) crystals. It is a semi-permeable membrane, which means the air and moisture can pass through its pores. Another shell called bloom or cuticle is present to protect from dust and bacteria. Bloom is the outermost coating of the egg shell. Vinegar is acidic in nature and when it comes in contact with calcium carbonate, reacts with CaCO3 and release bubbles. The bubbles released around the egg over the course for a few days are actually caused by the reaction between vinegar and calcium carbonate. These bubbles are carbon dioxide bubbles and seeing the bubble around the egg confirms that the reaction between vinegar and calcium carbonate is happening which eventually changes the hard egg shell into rubbery. Finally, after 6-7 days, the eggshell fully dissolves leaving only the outer membrane which is soft and flexible. Remove the egg from the vinegar solution and observe the calcium carbonate shell, which releases a chalky residue on the egg membrane. Also, notice how the egg white is colored after sitting in colored vinegar, which means the color penetrates the semi-permeable membrane eggshell.
Turn it into a science fair project
You may be wondering how to turn this time-taking science experiment in to a science fair project!! It is so easy to turn this simple activity in to a science fair project. Read on:
1) Ask yourself Questions: Science is all about asking questions and finding answers using scientific methods. What other acidic liquids like tomato juice, lemon juice, etc. would dissolve an eggshell? Are some eggshells harder to dissolve than others? Why does the color seep through the membrane but the albumen doesn’t leak out of the membrane? Etc.
2) Make a Hypothesis: A hypothesis is the prediction of you and your children about the experiment results which may be or may not be true! But making hypothesis helps kids to improve their questioning and observation skills.
3) Research: Do research online to analyse your predictions and find answers to your questions before you start the experiment. Research also helps to find enough information on the science activity you are going to perform.
4) Experiment: Ask your children to test their hypothesis by experimenting with the variables and encourage them to document. Be sure to take notes of each experiment and what happens; this is called your data.
5) Draw a Conclusion: Draw a conclusion on your hypothesis once you perform the science activity. Also include whether your hypothesis correct or not!
6) Share your findings: Create a crystal clear presentation with your observations and findings. Include your observations, research, hypothesis, the data you collected, and your conclusions. Be sure to include images and samples!
Extend the experiment
You can even extend the experiment using different types of eggs, different liquids, and Use vinegar to dissolve other items made up of calcium. For ex: Try chicken bones or limestone rocks. Do they also break down in vinegar?

You can also transform this spectacular rubber egg science experiment into a STEM project by adding variables and asking a few extra questions. The questions include:
1) Will shells dissolve in different materials?
2) What happens if you use a different kind of dye?
3) Will eggs change color without the help of vinegar?
4) Do the rubber egg dry out after removing it from the vinegar or any other solution?
Hope you find this experiment super-easy and simple while adding a lot of fun to your kids learning time. Happy experimenting!!
Explore more Egg Science Experiments:
Now let us discuss some FAQ’s, meaning Frequently Asked Questions. FAQ’s are helpful for visitors to find answers to all their question and answers in one place and improves user experience. Also, FAQ’s provide basic information regarding the experiment details on hand. Here we go with the most important and useful FAQ’s regarding Rainbow Rubber Egg Science Experiment.
Q&A to discuss with kids after the experiment
Eggs are handy to perform a lot of science experiments and explore the little science out of them. Pick a raw egg from your kitchen and place it on your experiment table. Now take a glass container or Mason jar and fill it with enough quantity of vinegar. Then, add about 10 drops of food coloring to the jar. Stir until the Vinegar and food color solution mix up gently. Place the uncooked egg into the jar filled with colored vinegar solution. Let the eggs sit for some time or a day. Then, take out the egg from the colored solution and wipe off with a dry towel. Amazingly, the colored egg is the outcome of the activity. The egg white absorbs the color and transforms the normal egg in to a beautiful and colourful egg.
Absolutely Yes. We can turn a raw egg in to a rubbery egg using simple instructions and easily available kitchen hold items. Collect a glass jar, enough amount of vinegar, and a raw egg from your kitchen. Simply, fill the glass jar with vinegar solution and put the egg in. let the egg sit for a day to observe the desired results. The chemicals in the vinegar solution and the chemicals in the egg shells react amazingly and make the egg shell disappear, eventually turning the hard egg shell in to a rubber. It is sounding like a magic, isn’t it!?
Vinegar is acidic in nature whereas the egg is made up of calcium carbonate. When the uncooked egg is placed in the vinegar solution, the acid in the vinegar solution breaks down the egg shell and make it disappear after some time. The calcium carbonate in the egg shell dissolves and releases carbon dioxide gas in the form of bubbles around the egg in vinegar solution.
Making rubber egg using toothpaste is a simple experiment designed to show how the fluoride in toothpaste protects the calcium in eggshells against the softening effects of acid. Coat the Fluorinated toothpaste to some part of the raw egg and keep the other part free of toothpaste coating. Then, soak the egg in vinegar solution and let it settle for a day. You will observe the vinegar solution softens the toothpaste-free oar tog egg shell and turn it in to a rubber whereas the tooth paste coated part of egg shell remains hard as earlier.
The membrane is a layer of material covering the outer part of the egg is known as egg membrane. Egg membrane is also referred as shell membrane is the semi-permeable membrane visible when one peels off a boiled egg. There are two shell membranes, inner and outer. These two membranes provide an efficient defence against bacterial invasion and are made partly of keratin.
The amazing Rainbow Rubber Egg Science Experiment takes anywhere between 1 to 6 days to observe the desired results. That’s a long time but do not pick the egg in between as it gives a half-pickled egg in to your hands. After 5-6 days, take out the egg from the vinegar solution and observe, you will notice the rubbery nature of the egg. Check the egg placed in vinegar solution daily to determine whether or not it has become rubbery. Add vinegar if needed to keep the eggs submerged. Most eggs will be rubbery in one to two days, but some eggs may require 4-5 days.
The rubber egg lasts for one or two days. Making a bouncy egg or naked egg is a classic science experiment! Kids will enjoy playing with bouncy eggs but be sure not to apply or hit force hardly because the rubber egg gets break down and makes the play area messy and smelly.
Using a few household items, you can make a regular egg or a hard-boiled egg into a bouncy rubber ball. Kida can perform this simple science activity with a couple of friends, or parents, or by themselves. All you need to gather is some vinegar, a container, and an egg or two. Get a glass container filled with vinegar solution ready and add dye if you want to color your bouncy egg. Wait for the shell of the egg to completely dissolve and remove the egg out of the glass jar. Bounce the rubber balls.
Vinegar is 4% acetic acid and when you put a raw egg in vinegar solution, the calcium carbonate in an egg shell reacts with the acid in vinegar. If you leave the egg in the vinegar solution for about long hours, eventually all the calcium carbonate will be dissolved by the acetic acid in the vinegar, leaving just the soft membrane and yolk behind.
The six different parts of an egg include:
The Shell
The Inner and Outer membranes
The Air Cell
Albumen
Vitelline Membrane
Egg Yolk
Also, the other main parts of the egg include: Chalazae, Mammillary layer, spongy layers, germinal disc, cuticle or bloom, and Nucleus of pander.
Eggshells comprise of calcium carbonate, in addition to small amounts of protein and many other organic compounds. In nature, calcium carbonate is the most common form of calcium, making up coral reefs, seashells, and limestone. It is also the cheapest and most widely available form of calcium in supplements.
The bacteria Salmonella Enteritidis, is the most common bacteria found on the raw eggs, causing the most common form of egg contamination such as vomiting, diarrhoea, fever, abdominal cramps, food poisoning, etc. Several people get exposed to this bacteria and develop no symptoms but the exposure to the bacteria is dangerous for immune-compromised people (pregnant, elderly, infirm). What to do? Pasteurize your own eggs by holding them in 60°C or 140°F water for 4 minutes. The water is not hot enough to cook the eggs, but it is hot enough to kill bacteria. Acids such as lemon juice and vinegar also kills bacteria.
When a raw egg is soaked in fresh lemon juice, the reaction can be same to the reaction happens when a raw egg is soaked in enough quantity of vinegar solution. The egg shell gets dissolved due to the reaction with acid in lemon juice and forms calcium citrate. As soon as the reaction starts between acid in lemon juice and calcium carbonate in egg shell, bubbles are formed immediately and the bubble foam is builds up around the shell, making the egg membrane soft and visible.
The process of making clear or naked eggs is very simple! All you need to do is to gather kitchen supplies like glass jar or bowl, raw egg, and enough amount of vinegar. Place a raw egg in a glass jar and cover it completely with enough amount of vinegar. Then, wait for 2-3 days and drain off the vinegar from the bowl or take out the egg from the vinegar solution. When you see the egg, you can see the egg feels soft, rubbery, and naked. Clean off the remnants (if any) on the egg membrane and be careful not to break the membrane.
Absolutely YES. We can really make bouncy eggs without using vinegar!! LEMON JUICE is the best alternative to vinegar since both the liquids are acidic in nature and matches with other acidic properties of each. In the same way how vinegar reacts with egg shells, the acid in lemon juice reacts with the calcium carbonate in egg shells and makes calcium citrate releasing gas in the form of bubbles around the egg. Place a raw egg in a glass jar and fill it with fresh lemon juice until the egg is completely submerged. Let it sit for 4-5 days. After that remove the egg out of lemon juice and you will feel the egg shell is disappeared and feels soft and bouncy.
