Here is an amazing 6th Grade Science Fair project idea – make your own 3D model of Layers of Earth using recycled materials.
Why Use a 3D Model and Recycled Materials?
A three-dimensional model best explains and gives the closest representation of our spherical Earth.
Using recycled materials reduces the amount of waste produced, contributing a small part to the grand scheme of saving Earth.
DIY Layers of Earth Science Fair Project
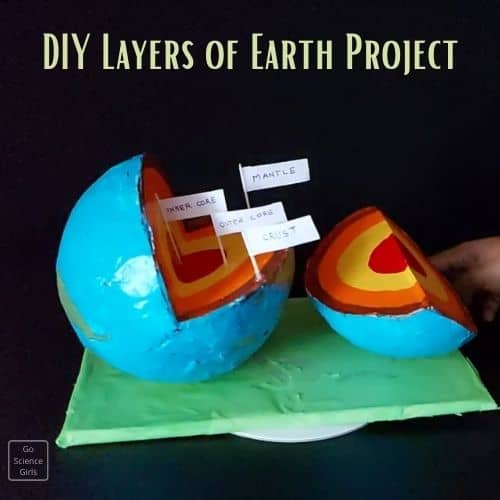
How To Make a DIY Creative Model Showing the Different Layers of the Earth?
A DIY model requires a few tools, adhesives, and of course, colors for painting.
Things you need
- A plastic or silicon ball (for building the structure of the model)
- White Glue
- Newspapers (for building the layers of the model)
- Three Large Sheets of Cardboard (2 for the creative model, 1 as the base of the model)
- A dark-colored Marker (Black/Blue)
- A Big Picture of the World Map (for reference)
- Acrylic Colours – Blue (sky/dark), Green (light and dark), Yellow, White, Brown, Red, Orange
Steps:
- Take the bowl and place it on a flat surface. On top of the bowl, place the football.
Layering Of Newspapers
- Take the newspapers and cut each page into rectangles. The length and breadth should be approximately 15 cm and 7 cm, respectively.
The rectangle-cut newspaper pieces are needed in 5 layers to cover the football. You can cut more later as required.
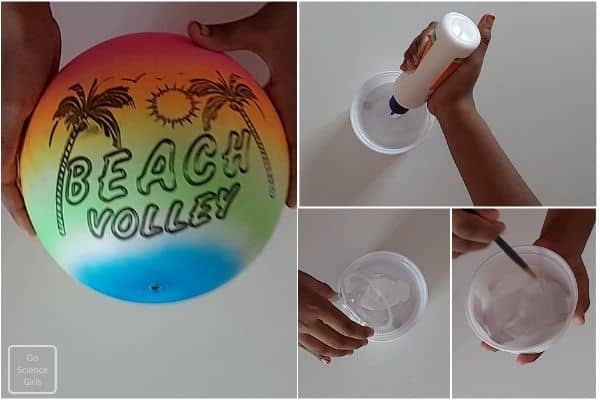
- Dip one of the brushes in the white glue liquid solution and apply it to the football’s surface. Quickly paste one rectangle-cut newspaper onto the area where you applied the white glue.
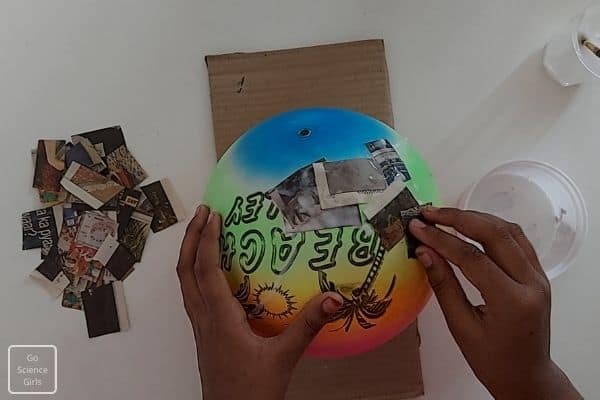
- Apply the white glue over that too. Repeat the above steps until the entire football is covered with the newspaper cuts and no ball cover peeks through.
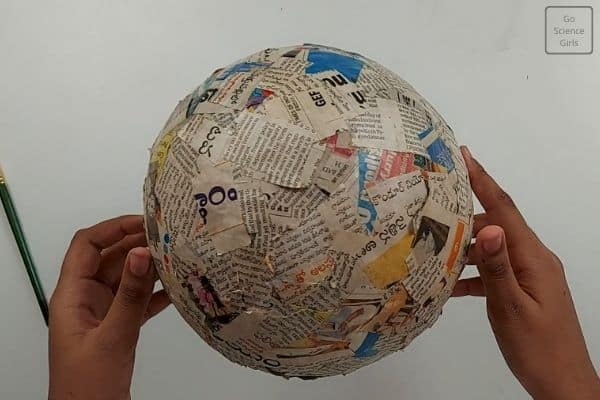
Repeat pasting a layer of news papers and dry it out until you are sure that you made a thick layer of cut papers on top of the ball.
Make sure it is completely dry.
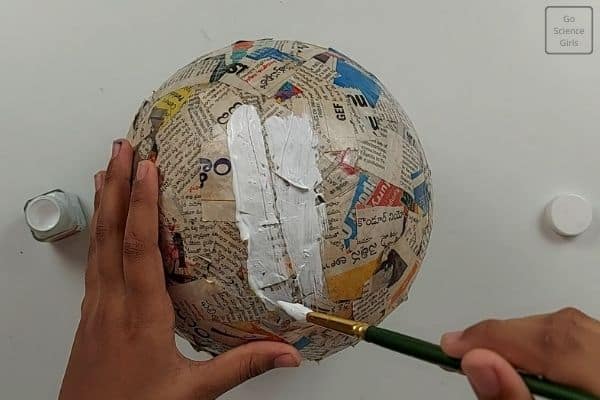
- Your ball-earth is now ready to be cut.
Marking
- Take a pencil and lightly (should be visible) mark the football, dividing it into 2 hemispheres longitudinally. Again, divide the hemispheres into their halves longitudinally.
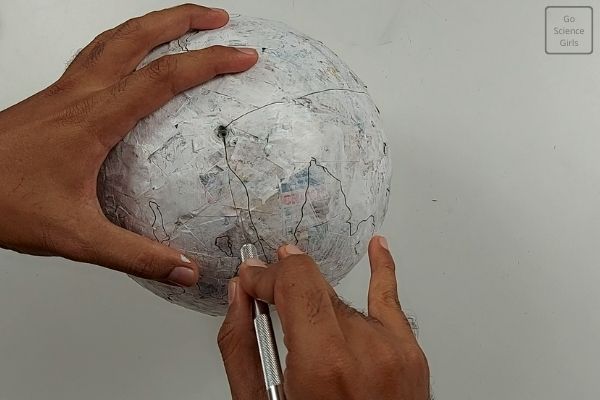
You will end up with four quarters of two hemispheres.
Cutting
- Take the cutter/a pair of scissors and cut only one quarter.
As soon as you cut the football, it bursts to leave behind a shell, made up of 5 to 10 layers of newspapers. These layers form the main structure of the 3D creative model.
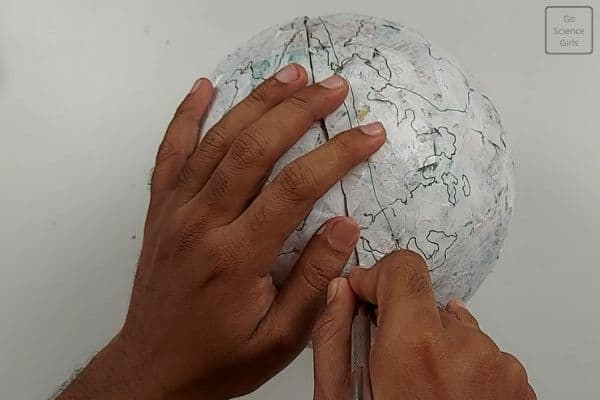
You now have two parts of the model. One is the three-quarters piece and another one-quarter piece of the newspaper-tissue sphere.
Using Cardboard
- Take the cardboard, and place one of its edges aligned to the diameter of the three-quarters piece, and the face of the cardboard should press against the semicircle of the three-quarters piece.
- Using a dark marker, trace the margin of the semicircle of the three-quarters piece onto the face of the cardboard pressing against it.
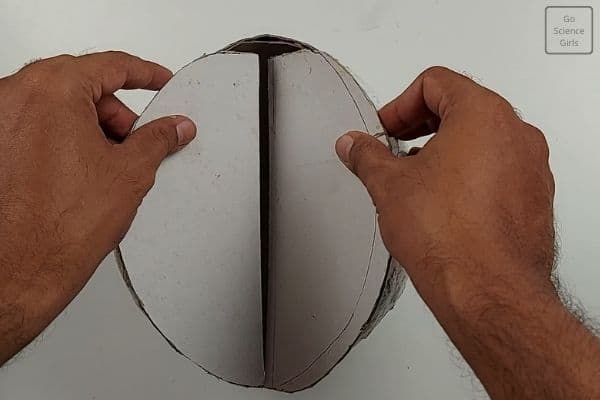
- With the help of the cutter, cut the marked semicircles from the cardboard sheet. Now, you have two semicircular cardboards for the three-quarters newspaper piece.
In total, four semicircular cardboards.
Gluing
Get your insta-glue or hot glue gun out for some gluing.
- Take the first two semicircular cardboard pieces and apply glue all over their margins. They need to be glued in two ways. One, to each other and two, to the three-quarters piece.
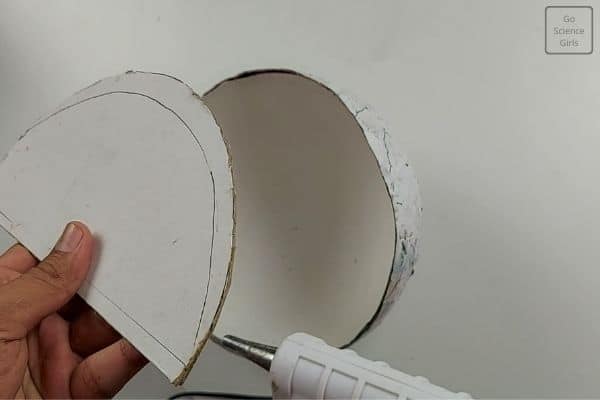
- Now, align the curved margins of the two semicircular cardboard pieces to the margin of the three-quarters piece. The second gluing job is done. Let it dry.
- Take the remaining two semicircular cardboard pieces and apply glue all over their margins. They need to be glued in two ways. One, to each other and two, to the one-quarters piece.
Using Cardboard – Part 2
- Take the third and last sheet of cardboard. This is for the base of the entire 3D model, including both the three-quarters piece and the one-quarter piece.
- Make both the pieces ready as shown below.
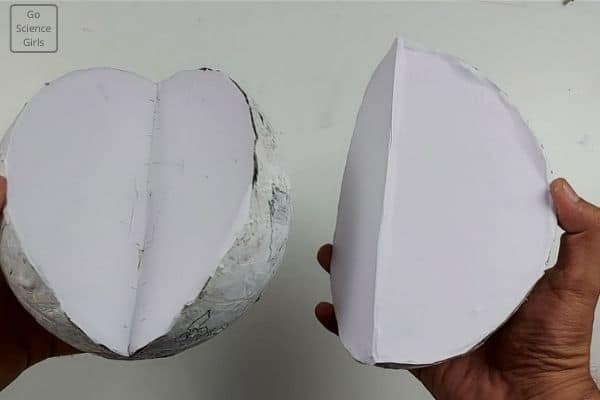
Attaching and Detaching
- Attach the three-quarters and one-quarter pieces, temporarily, using paper tape, which is removable.
- Using a big picture of the world map and the dark marker, draw the same onto the newspaper sphere.
- Detach the three-quarters and one-quarter pieces by removing the paper tape strips.
Coloring
Painting Time!
- Use the acrylic colors of sky/dark blue for the seas and oceans and green with traces of yellow for the land on the drawn world map of the newspaper-tissue sphere.
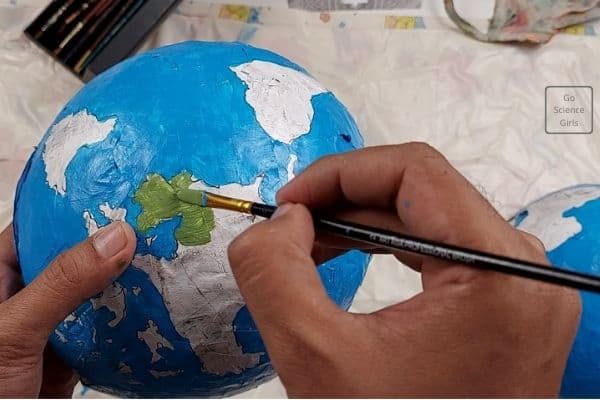
- Paint white for the icy regions of the north and south poles.
- Use light green for the face/top and brown for the edges/margins for the base.
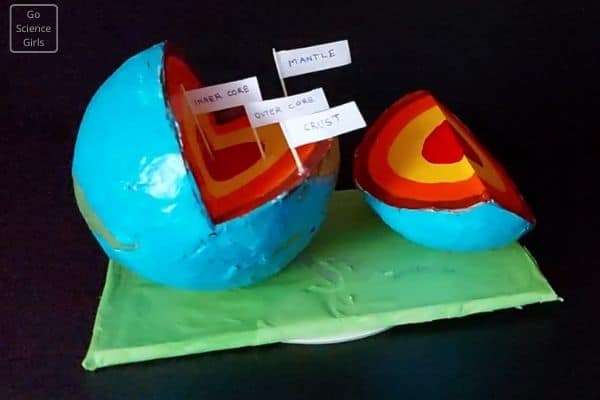
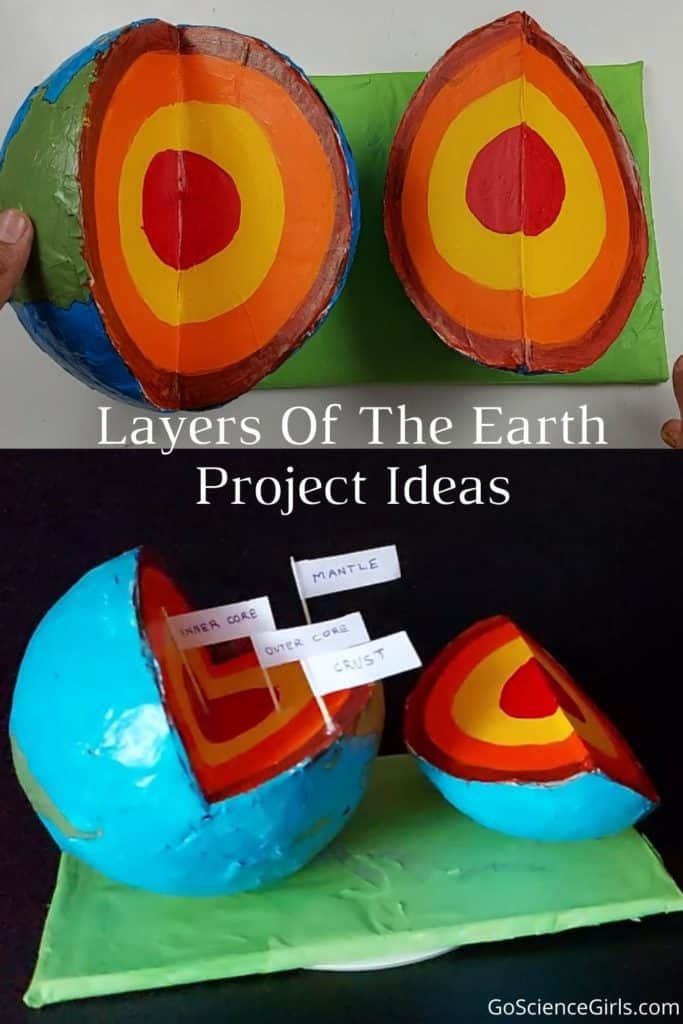
- Using the same pencil for marking the hemispheres, draw the four different layers of the earth in semicircles on the tissue paper-covered semicircular cardboard pieces, now attached to the three-quarters and one-quarter pieces.
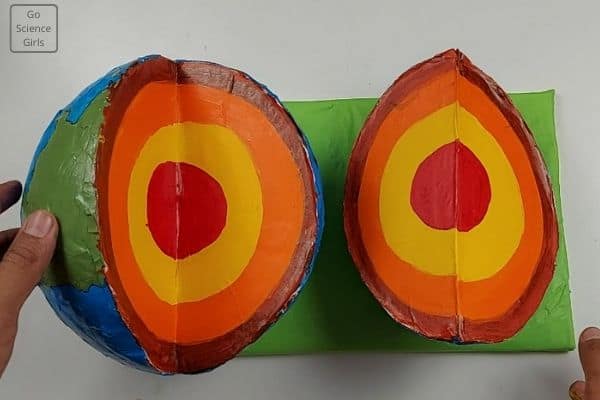
- Paint each layer in the order of outermost to innermost as Brown, Orange, Yellow, and Red.
Labeling
- Divide the 8 strips of labels into 2. 4 for the three-quarters piece and 4 for the one-quarter piece. Write the following 4 layer terms on one set of labels (4) and then the same terms on the other set (4).
You should write the names with a dark marker for a clear view, and in the same order, the colors have been painted, peripheral to central.
The layer names are –
- Crust (brown)
- Mantle (orange)
- Outer Core (yellow)
- Inner Core (red)
Your DIY Layers of Earth Project is as natural as ever and ready for presentation.
What are the Various Layers of Earth?
Briefly mentioned in the introduction, the planet Earth constitutes 4 layers, explained below in a nutshell.
1. Crust
The layer first from the periphery and the last from the center. The thinnest and least dense layer of all 4. It is simply the ground or soil we step on.
On land, it ranges from 30-70 km depending upon the point it is measured from, while in water, it is a mere 5 km. This is because the sea is already present below the land level and is much nearer to the mantle. Hence the vast difference.
2. Mantle
The layer second from the periphery and the third from the center. It is mainly composed of minerals and mineralized rock of silica, magnesium, and iron.
It is approximately 3000 km.
This is the last layer that separates us from the inner earth regions, which have not been reached to date. Even though technology has developed at lightning speed over the past two decades, traveling to the inner earth is still impossible.
- Another layer that is not very defined and is actually a combination of crust and mantle is the ‘tectonic plates.’ The movement of these is the cause of Earthquakes.
3. Outer Core
As we move deeper into the bowels of the Earth, the temperature soars unimaginably. The third layer from the periphery and the second from the core have been recorded to have a temperature of over 5000℃. Scorching hot!
The outer core components are Iron and Nickel. These solid metals exist as liquids in the core. Shocking!
This layer is very significant to Earth, and more importantly, to us. The presence of metals in this layer creates and sustains a magnetic field. The function of this magnetic field is to shield us from the Sun’s harmful radiations.
4. Inner Core
The final and innermost layer from the periphery and first from the core is the hottest of all. It is speculated that the temperature may be comparable to that of the Sun itself. Unbelievable!
Imagine living over something that has been equated to the Sun, the hottest star in all of the Milky Way Galaxy.
Though it is also made up of Iron and Nickel, their state is not liquid but solid. This may come across as a surprise. But, there is an explanation of why it is so. The answer is Pressure.
High pressure at high temperatures converts liquid to solid. Hence the said state of the metals.
Other ways to showcase – Layers of the Earth Project ?
- Using Thermocol
- Right off the bat, the first alternative that comes to my mind is, using Thermocol instead of wherever you used cardboard. My suggestion is thatThermocol also has the same capability of providing structural support as Cardboard.
It can even beat cardboard for its lightweight and density and white color, which are good attributes when making such 3D creative models.
- Another idea that comes to mind is using the Thermocol for the entire model, i.e., complete replacement of football with a sphere of Thermocol, or better known as styrofoam.
This will save your time for the following actions –
i) No need to go through the whole hassle of using newspapers and tissue papers. You can simply use the Thermocol’s surface directly, which is white and ready to use.
ii) Cutting semicircles from the cardboard and pasting them onto the newspaper-tissue sphere.
- Using Colored Dough.
- Instead of cutting, gluing, drying and the long list of procedures and steps, just use different colored doughs.
Form a sphere of the innermost layer using red-colored dough, which is for the inner core. Flatten a yellow-colored dough as the next layer, which is the outer core, and wrap around the sphere of red dough.
Repeat the steps for the subsequent two layers. In the end, cut the complete sphere, and you will see the clear segregation of earth layers.
- However, suppose you opt for any of the above ideas. In that case, you are not using recyclable material, defeating the whole purpose of making a ‘3D model for earth layers using recycled materials’.
To Summarize
If you follow all the instructions and steps meticulously, then do not fear. Undoubtedly you will win First Place for your Science-themed Recycling Competition and will shine on top among your classmates.
Happy project-making!
