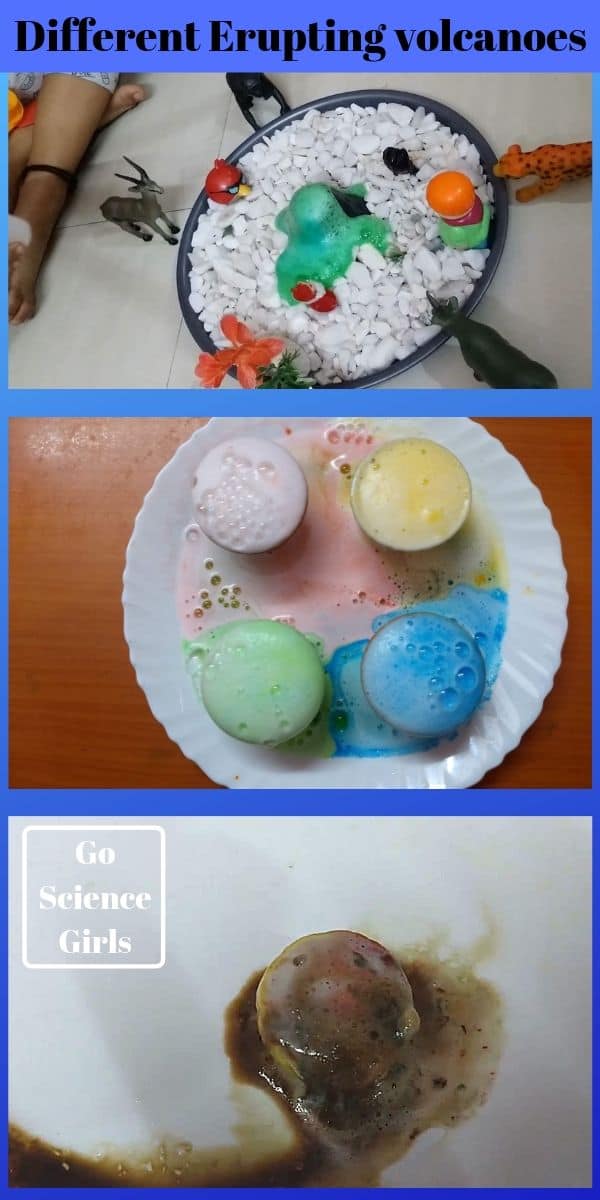
Are you looking for an easy fun and intellectual science experiment for your kid’s science fair!? If yes, then you are on the right page where you will get three easy simple and super fun experiments that works better as a science project. What’s that!? It’s a ‘Volcano making’ at home with your kids.
After watching a documentary on television regarding volcanoes, aroused an interest to create fake volcanoes. Immediately I shared my idea with my girls of 5 and 7 years old. They were very excited by listening the name itself. That is how I started experimenting this super fun activity at home.
Volcano making can be a lot of fun for a summer family project. This fizzy science experiment gives young children an exciting and learning experience as they watch and learn about incredible geological formations while experimenting volcano. This is a perfect activity for 3-4 year olds, 5-6 year olds and up. Even preschoolers can enjoy the activity by watching.
Method-1: Making Volcano using Baking Soda and Vinegar

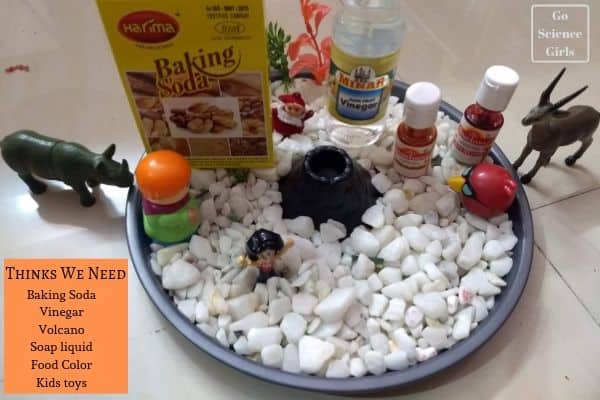
You will need few simple things that you can find in your home or stores easily. The supplies required to mimic the lava that of a real volcano are listed below:
- Baking soda
- Vinegar
- Food colouring (your preferred color)
- Dish wash soap
- Volcano mold (you can create one using play dough)
- Kids toys (optional)
[*Product links are affiliate links. Your support is highly appreciated]
Procedure

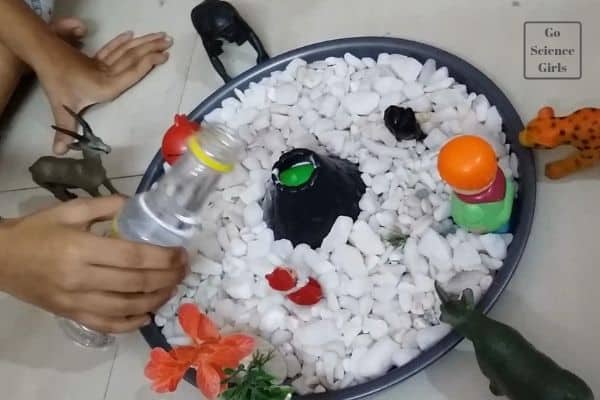
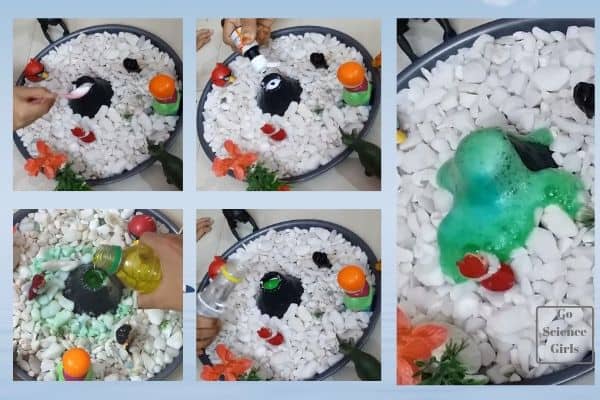
1) Take a ready-made Volcano or you can make it at home using plastic bottles. Fill the volcano with white marble stones to give it a colorful look as well as kids can get better view on the white background.
2) You can also decorate around the volcano with some kid’s toys to make it more attractive and catchy. Adding kid’s toys to the volcano also grabs kid’s attention as toys are never boring for any kids or even adults. J
3) Find some private space since the volcano eruption makes a mess. As we are using ready-made volcano plate, hopefully the mess is only inside the plate.
4) Do some preparations or trials before you start the actual experiment in order to learn proper amounts of ingredients that decide how big your volcano should be!
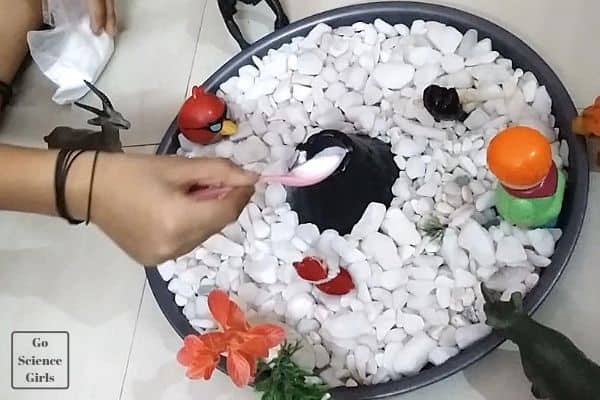
5) Now my elder daughter Prithika added required amount of baking soda (one of the magical ingredients) into the volcano. She is always interested in adding ingredients. In one way, it helps her to learn more about mixing and measurement concepts.
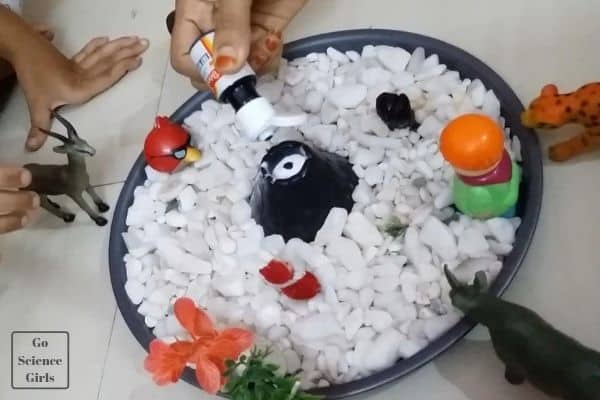
6) Seeing her sister, my younger one Tisha (5 years old) also excited and got ready to add ingredients to the volcano. She added few drops of food colouring. 1-2 drops of food colour gives nice colourful effect to our volcano.
7) Then add a few ml of dish wash soap to the volcano carefully.
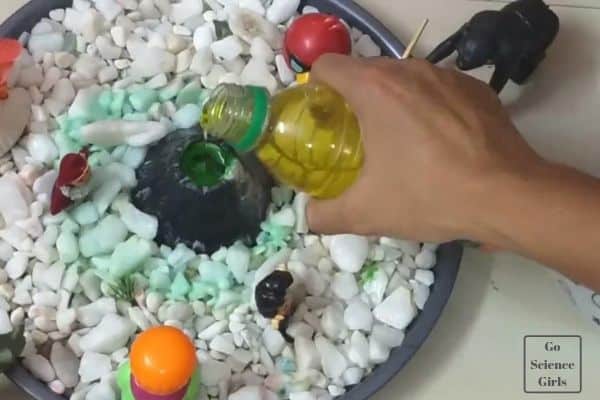
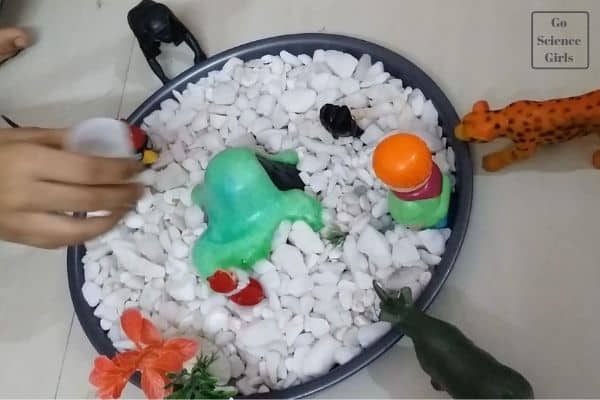
8) Now for the eruption, add another magical ingredient i.e. vinegar to the volcano.
Kids started clapping and shouting by seeing the amazing volcano that is fizzing and frothing out of the volcano set up. This amazing and wonderful volcano is resulted with the reaction of baking soda and vinegar.
Tip:
If you want the larger eruptions, increase the amounts of baking soda and vinegar. That’s it so simple and fun included. Kids will enjoy to take on a sense of pride for their achievement.
Now let us jump into the second method of making homemade volcano which is as simple as first method.
Method 2 Volcano in the bowls using same ingredients

Making homemade volcano is a fun science activity for kids. All you need is to provide enough space for volcano to erupt. So you can create volcano using anything from the kitchen but it should be wide enough. Here we are going to create volcano using wide enough bowls and the same magical ingredients.
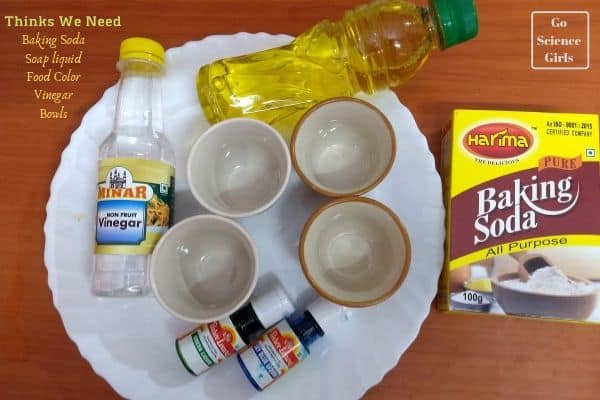
- Baking soda
- Soap liquid
- Food colour
- Vinegar
- Bowls (make sure the bowls are neatly washed as the volcano is not formed if there are any other chemical substances which may get react and form other reactions)
Procedure

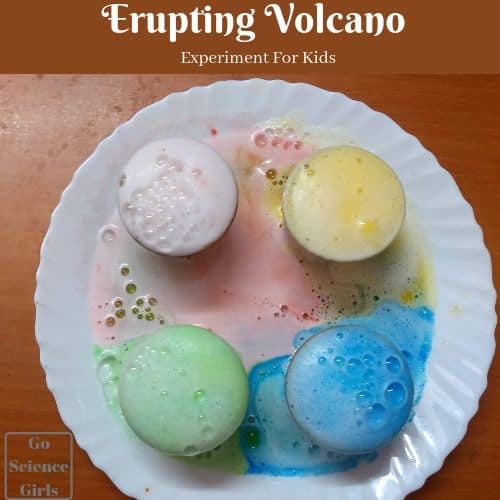
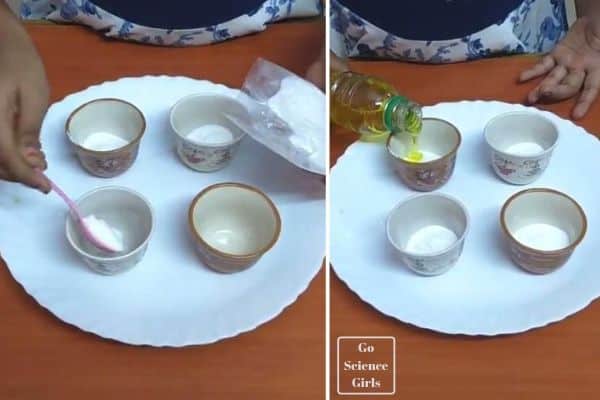
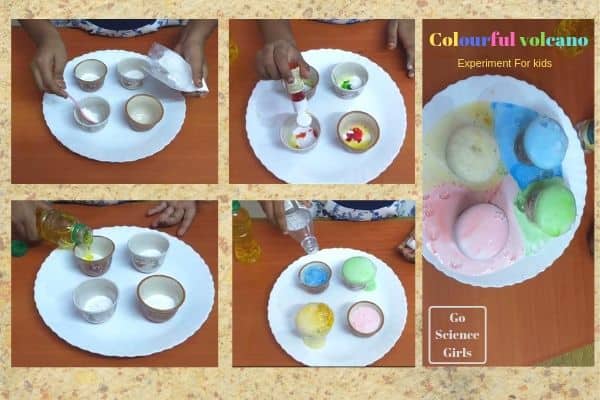
1) Take four bowls and arrange them neatly on the work table or work place. It is suggested to take the bowls in a wide and big plate so that the eruption will flow or spread wide area and be within the plate.
2) Add different food colours to four different bowls so that it gives different coloured volcanoes. My daughters are excited to add their favorite colours. In fact this is their most favorite step in every activity we does (if there are chances to add any colours while experimenting).
3) Now add dish soap liquid in required amounts to each of the bowls. Be careful while adding dish soap liquid especially with the kids. Ask your kids to wash their hands properly if the dish soap is touched to their hands. If not it may go into their eyes when they rub mistakenly.
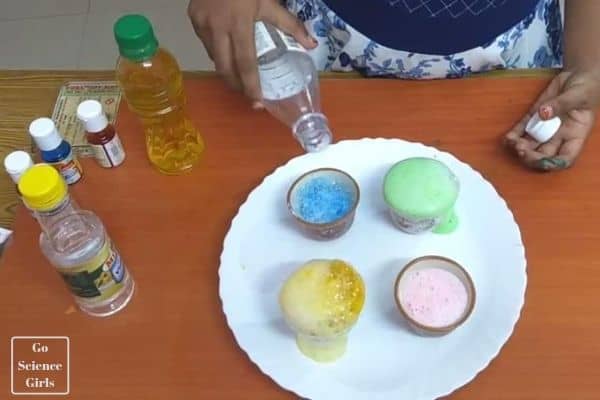
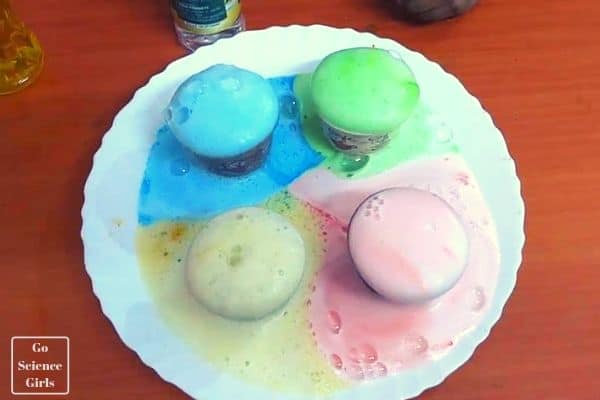
4) Finally add vinegar to get the volcano eruption in the bowls. As my kids already knew about the vinegar’s reaction in this experiment, they were very excited to add vinegar. My elder one took the chance adding vinegar to the bowl. You can see the colourful volcano after vinegar is added. This is due to the reaction between baking soda and vinegar.
Kids were fascinated watching the mimic done by vinegar in the last resulting in amazing and colourful volcano in all the four bowls.
This is the simple and easiest way to attract or fascinate the people at the science fair.
Method 3 Creating Volcano experiment with Lemon
Make lemon volcanoes (ideal experiment) along with your kids using kitchen ingredients. The end result is wonderful that leaves a surprise on kid’s face. This is another easiest method to create colorful volcano using lemons. Let us see how we can amaze children using lemon.
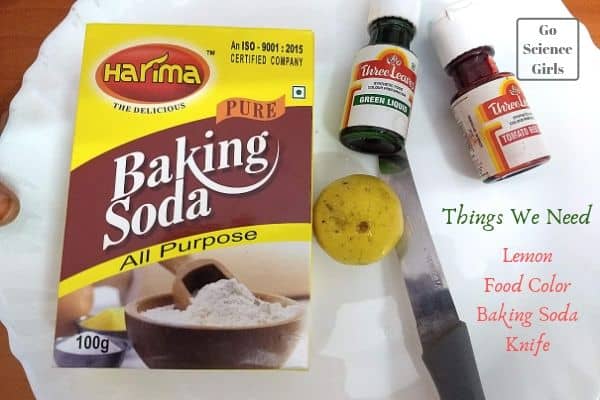
Materials required

All you need are:
- Tray or a white plate
- Lemons
- Cutting knife or Butter knife
- Spoon or Fork
- Baking soda
- Food coloring
[*Product links are affiliate links. Your support is highly appreciated]
Instructions

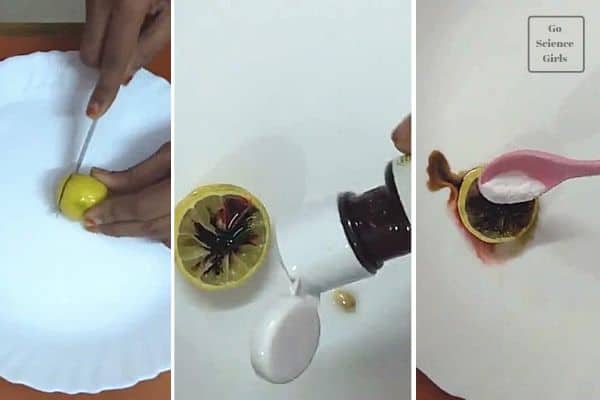
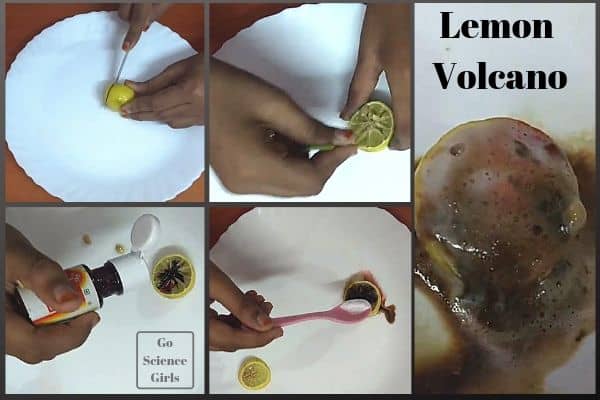
1) Take a medium sized lemon and cut into 3/4th using butter or cutting knife.
2) Squeeze out the seeds and some lemon juice (leaving some juice) with the help of spoon or fork.
3) Add few drops of food colour to the inside of the lemon. Choose some bright colours to see bright and colourful lemon volcanoes. We used red orange and yellow food colours to get orange-red lava! Kids enjoyed watching bright display of volcanoes.
4) Put some baking soda on top of the lemon to see the amazing results.
5) Use spoon or fork to let the baking soda inside the lemon.
As soon as you add the baking soda to the lemon, there happens a chemical reaction again between the lemons (acidic in nature) and the baking soda (base). This chemical reaction leaves a gas known as carbon dioxide which is responsible for the frothing and fizzing of the eruption coming out of the lemon.
My kids felt this as very simple and easy activity to create colorful volcano and they are very much attracted to lemon volcanoes. They have done this activity thrice to satisfy their excitement. J
A volcano is a typically conical mountain or hill that has lava coming out from a magma chamber under the surface of the ground. The materials include in the volcano are lava, gaseous sulfur compounds, steam, heat, broken rock pieces and ash. The volcano erupts and explodes all these materials out when there are right conditions like high temperature and pressure.
However, in our home experiment of creating fake volcano gives an idea of how a volcano looks like when the lava erupts. This is a simple classic science experiment works based on a chemical reaction and showing physical volcano eruption. The chemical reaction is nothing but a reaction between the baking soda and vinegar results in the release of a gas called carbon dioxide. Carbon dioxide is the same gas which is used in sodas for the purpose of carbonation. You can observe the same reaction what you see when the soda bottle is shaken up and remove the bottle cap. The pressure created while shaking make the gas molecules to spread out as there is no enough space to spread, it comes out of the bottle when the cap is opened. In the same way, the carbon dioxide released (because of the chemical reaction between baking soda and vinegar) builds up enough pressure inside the volcano finally results in the eruption in order to exit the bubbles.
In other words, the chemical reaction between baking soda and vinegar is said to be an ‘Acid-Base Reaction’. Because the chemical reaction is happening between the acetic acid (vinegar) and a base (sodium bicarbonate). The acetic acid (a weak acid) reacts with and neutralizes the base (sodium bicarbonate). The gas released during the reaction is the carbon dioxide. Carbon dioxide is the main culprit for the fizzing and bubbling of the wonderful ‘eruption’.
Obviously it not the real volcano but it is a cool thing to watch and learn about volcanoes visually.
This project takes not more than 30 minutes to complete. I could say that it is a classic science experiment because kids will get to learn chemical reactions and observe what is happening when a volcano erupts. Sounds cool right!!? Did you know the carbon dioxide gas released during the experiment is also present or produced during real volcanoes!! Hope you all enjoyed to learn about colorful fake volcanoes in three different methods. Happy experiment!!
Some Q&A for your interaction with kids
In our experiment, baking soda and vinegar are the magic ingredients to create a volcano at home. When the baking is combined with the vinegar, there happens a chemical reaction producing a gas called carbon dioxide which causes a volcano to erupt (looks similar to the real volcano eruption). The carbon dioxide gas creates pressure to throw out the gas bubbles inside the volcano thus exit the volcano like real ones.
We always have to be very careful while adding ingredients in right amounts in order to get our wonderful results. We may not get our desired results if we miss to add right amounts of ingredients. In our experiment, we require 2 table spoons of baking soda to mix in 1/4th cup of vinegar to erupt a beautiful volcano at home.
Take your chemical volcano project to the next level and make it more exciting by creating glowing volcano. For a glowing lava, use tonic water instead of vinegar and a black light. You can also use both the ingredients i.e. take equal quantities of vinegar and tonic water to make erupting glowing volcano under a black light. Tonic water consists of fluorescent compound called quinine, which is responsible for glowing volcano eruption. The other way to create glowing volcano is to wrap the volcano around the tonic water bottle and just drop the Mentos candies into the bottle. You can see the amazing glowing volcano at home. One more method to see colorful glowing volcano is to mix the chlorophyll with vinegar. The chlorophyll when expose to ultra violet light, starts glowing in red. Hence, you can see the red glowing volcano.
You see a lot of bubbling and foaming while erupting volcano. Formation of bubbles and foam is due to the combination of baking soda and vinegar. When the baking soda (a base, sodium bicarbonate) is mixed with the vinegar solution (an acid), there happens a chemical reaction releasing a gas known as carbon dioxide. The carbon dioxide is unstable and fills the volcano with a lot of bubbles. Due to the pressure builds up in the volcano due to carbon dioxide gas, the gas bubbles gets exit the volcano like a real volcano eruption.
Both the ingredients are responsible for the chemical reaction because baking soda is a base (called sodium bicarbonate) reacts with the vinegar, an acid producing carbon dioxide.
According to the studies, using baking soda is completely safe since it is mild and unscented for kids. Baking soda has both the alkaline and antiseptic properties that soothes the acidic nature of skin and protects it from infections. It tastes bitter so kids obviously would not like to put in their mouth. However, it is always good to take extra care while using baking soda very often.

